Pages

Monday, December 31, 2012

2013 Love


May your New Year be filled with love, laughter, peace, prosperity, good health, good friends and every happiness!

Thanks to Madame Samm at Sew We Quilt for the 2013 image and click on the link to check out her line-up of upcoming Blog Hops for the New Year and hop into the quilty fun!

Happy New Year to you and yours!
:-)

Sunday, December 30, 2012

It's a Mystery!


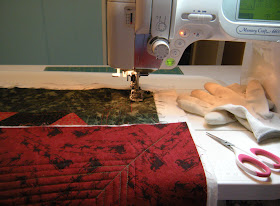
Here is my sewing for the first step of the

Since this is a mystery and a pattern that my SAYM friend, Jess Smith designs for profit as well as fun, I cannot reveal more.

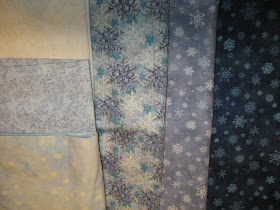
I can tell you that I love, love, love, love this pattern.  That is four "loves" because the design is actually four quilts in one.  It can be made as individual wall or baby size quilts or sewed together into a king size quilt.  I have plans to make all four designs, one for each season, and am choosing my fabrics so that I can group them together on a wall or maybe make the king size.  I am also using a scrappy background and may use some more of my snowflake fabric scraps in other parts of the quilt as well.  I love the visual texture of scrappy quilts.  I also love using up some of my smaller pieces of fabric.

One quilt top is an easy weekend of sewing.

Sew if you are looking for a fun easy project, please consider purchasing the pattern and joining us in the fun.  Jess is always very helpful with selecting fabrics and providing how-to help by email or on the forum.  After the mystery weekend the pattern will be available on her site as a whole pattern.

 
It snowed here yesterday ... a really good day to stay in and sew. This is what my backyard looked like late last night. Today the guys are shoveling ... another good day to stay in and sew.

More pictures on the Quilt and Needle Forum of my sewing and the other pretty quilts that are coming together this weekend.

Hope you will be sewing with us
 
Have a happy quilty day
 
:)

Friday, December 28, 2012

Q&N Winter Mystery Quilt Weekend


My Winter Mystery Quilt Fabrics

I am getting ready to sew with my friends at the Quilt & Needle
on Jess Smith's newest mystery pattern. 
 
It is called "A Quilt For All Seasons" and the
Fabric Requirements are posted on the


Hope you will be joining me in this quilty fun!
 
The more ... the merrier ... :-)

Wednesday, December 26, 2012

Getting Ready for "In Your Words"


Today I am working on getting ready for the


The cheerleader for this blog hop is Linda at Buzzing and Bumbling.
 
No sneak peaks.
 
You shall have to visit my blog on Thursday, January 10th,
to see what I am sewing.
 
I will also post a link on the day the blog hop starts so you do not miss any of the fun.
 
Cheers!
 
:)

Monday, December 24, 2012

Merry Christmas


Click on link to play...
 
 by Lea Michele

May God Bless you and yours


Monday, December 17, 2012

Christmas Stocking Hangout


Patchwork Christmas Stockings

Hello!  For those of you joining me for the first time for the

... welcome to my quilty corner! 

For those of you from the Monday Morning Link-up, I am happy your found your way back to my little scrapatch.

For those of you who have been following along for awhile, thanks for reading and  leaving kind comments. It makes me feel all warm and quilty.

I started these stockings here a week ago and I have the first four completed.   I have a few more to get ready for Santa so more stockings are in the works and ...

... this one is on my sewing table waiting for me now.

Although I used the template and patterns from  Maywood Studios Free Quilts & Projects as an inspiration, I have designed my own tops and I have found a way to sew these that I find easier than their instructions, which call for leaving an opening on the side to turn the stockings inside out and hand stitching the opening closed.  My method is all machine stitching and I leave the opening at the top and attach the cuffs with a ...


double seam to cover the cut edges.
 
Note:  This method is similar to a French Seam, where you would sew right sides together and then turn wrong sides together and sew a wider seam to cover the raw edges.

Here is my method, step by step ...

My first stocking was made with some 1.5" scrap strips that I had strip pieced a few years back for another long forgotten project.


Pin the template to the front, right side up, and use scissors to cut around the curves.
Cut the back with the pattern template facing down
 
so it is the mirror image of the front
 
cut the lining pieces together at the same time
from fabric that is folded double
 
add toe pads to the front using  a sew, flip, press and trim technique
 
add heel pad details the same way
 
press and trim and your top is ready

pin and sew front to back, right sides together, leaving top open
 

pin and sew lining together, removing pins as you go, 
leaving leaving top open
 
Turn stocking right side out, seams inside. and press.
Press lining wrong side and seams out.
 
Important Note:  Insert lining into stocking so that the seams are hidden between the layers and only the top is open.  Then make the cuff and hanger to pin to the top opening.


cut a 6.5" WOF  strip for cuff,
 measure top ...
my top openings were 16.5" so I cut the cuff strips at 17"
 
 
cut a 6" x 1.5" strip for hanger, fold in half right side together and sew
 
 
using a safety pin to turn hanger right side out
 
 
press cuff seam open and then press in half, right sides outward

The next step is to assemble
and to stitch the top closed.

Pin the folded cuff to the open top ...
 

make sure the hanger is up; reinforce hanger with stay stitching

 
Stitch the top opening closed through all layers, cuff, stocking and lining, removing pins as you go. 


First cuff seam is done.
 
The raw edges of the top seam will be covered in the next seam.

 
Press the cuff seam down, making sure the hanger is straight down
 
 
Turn the cuff inward and press
 
 
Stitch the second cuff seam about 1/2" from top being sure that the your new seam is below the seam that had been turned inward and that the hanger is straight. You can feel the bulk of the seam through the layers.


Turn cuff upward and press

 
Turn cuff outward and down and press.
 
 
Stocking #1 is Done!

Time to sew my current stocking project.

If there is a part of this tutorial that is confusing, please let me know and I will try to taker pictures to better explain the method.

Have a happy sewing day!
 
Ho! Ho! Ho!

Wednesday, December 12, 2012

 
A Mystery Quilt For All Seasons
(shhhhhhh ... super sneak peak)

This is the tease posted in The Quilt & Needle Newsletter.
 
The new mystery pattern is called "A Quilt for All Seasons"
and finishes at a comfy throw size of 65 inches.
 
<3 I love these mystery quilt weekends <3
 
Also in the newsletter was this announcement ...

"October’s Facebook Contest:“How Many Jessica J. E. Smith Patterns Do You See?”Drum Roll Please! And the Winner is … "
 
... ME!!
 
I won a free copy from my favorite quilt designer,  Jess Smith, 
 for her new
 

I am sew happy!

To get in the running for this great freebie, I entered a contest that ran on the Q&N Facebook Page.

I will be receiving this pattern in email instalments the weekend of the mystery, December 29th -30th, and I will be digging through my stash as soon as I receive the Fabric Requirements to find just the right fabrics.

Sewing with my friends on the Forum at the Q&N is a fun way to spend the last weekend of the year as we count down the end of 2012.

 Hope you will be sewing with us!
 
:-)
 

Monday, December 10, 2012

Sewing Quilty Christmas Stockings

My New Project

I have wanted to make quilted Christmas Stockings for years and every December the clock has ticked down to Christmas Eve with no stockings even started and we hang our old knit stockings.  The knit ones are a treasure from the past hung the first time for our oldest chid's first Christmas 29 years ago, but they are not handmade and I love homemade.

Last night I dug out some of my oldest Christmas fabric stash and found strips I started piecing years ago for another long forgotten project.  Today those strips and such are going to be stitched into a stocking. 

The template I am using is one I made a few years ago that I found on Maywood Studios Free Quilts & Projects site.  To find this template and their free patterns click on this link, then on "Quilts & Projects" and the "Free Patterns ... Make Something" and then scroll down the page until you see the stockings.

Time to sew!
 
Have a Happy Quilty Day!

Sunday, December 9, 2012

More Christmas Quilty Bloging Fun

CHRISTMAS STOCKING HANG OUT

December 17 - 24


Contact
 
 
To Hang Your
Handmade Quilted Christmas Stockings
and join in the fun!
 
Looks like my kind of party!
 
I am sew there.
 
 
For now I am sew here ...
 
 
If you have dropped into my blog to read my Quilter's Christmas Party posts, please join me for a cuppa and stay awhile and scroll down to the next two posts below where I have links to my tutorial for the quilt pictured above.

sew please

read

on ...
 

Quilty Christmas Open House

 Merry Quilty Christmas!
... to all my online quilting friends and welcome to my blog if you are here for the first time via the Quilter's Christmas Party from Sew Cal Gal.


My Christmas Tumbling Blocks small quilt is done!

This quilt was made with no "y" seams, no templates, no paper piecing.  I used only a regular straight quilting ruler and cutting mat. The pieces are triangles and diamonds that are chain pieced into strips and then the strips are sewn together to form the blocks.  To learn more about my method for making these Easy Tumbling Blocks, click on this link or visit "My Tutorials" at the top of this page.

Here are a few more pictures of the quilting. 

Ready, Set, Quilt!

Since my fabrics in this quilt are very traditional, I decided I wanted to use a quilting pattern similar to ones I have seen on antique quilts. 
Walking Foot Curves

To do this I used the walking foot on my home sewing machine and quilted gentle curves over the blocks.

This quilting is interrupted by a very important catnap!

As always, I had my ever present Quilty Kitty Helpers with me in my sewing room.


For the border, I did simple straight line stitching about 1/2" apart.

The I adding my binding by machine and turned and hand stitched it to the back. I always finish my quilts with these quiet hand stitching moments.


My favorite part of quilting is that moment when I complete that last stitch on the back binding ...  tie the knot ...  snip the threads ... smooth the quilt ... turn the quilt over and see my beautiful quilt finished ... and realize ...
 "I made that!" 
That wonderful feeling never gets old no matter how many quilts I make, how big or small they are, how much I struggled with them, how imperfect they are. 

I am really pleased with my quilt and am planning to make a Tumbling Blocks Baby Quilt someday.


This and all my free tutorials may be found in


If you try this method, please let me know as I would love the feedback.  If you piece a quilt this way, I would love to see a picture!  If you use this method and post pictures and write about it, please link back to my blog.

I will be making more posts today for the


Sew please stop back later if you have the time.
My Quilty Door is Always Open
Ho! Ho! Ho!
 ... and a ...
.. for more of My Quilter's Christmas Open House

Please

Read

On ...