Easy Tumbling Blocks
Sew Into Strips
The tricky cutting part is over.
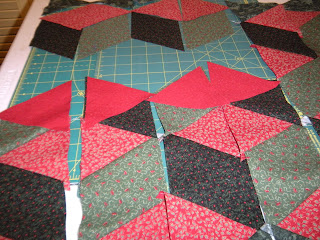
The sewing is easy chain piecing the diamonds and triangles into strips
and then pinning and sewing the strips together.
Keep your blocks laid out next to your sewing machine. I like to work in small sections and lay my sewn units back down next to my unsewn ones so that I am less likely to make a piecing error.
Start by piecing together two pieces in a strip. Carefully match the long points of the diamond to one of the triangles.
Sew the same pieces in each row, one after the other in chains. After you have done this unit in each row, snip the threads chaining them together and place them back down in place on the table.
Finger press flat the light triangles toward the medium or dark fabrics as you sew.
Continue to sew the next triangle or diamond to each strip.
Align each seam carefully before sewing.
Continue in this manner until all the pieces in one strip are sewn together.
Using your iron, press seams toward the darker fabrics,
These are my strips sewn together, but not trimmed. The red fabric on some of the long edges sticks out, as do the "dog ears."
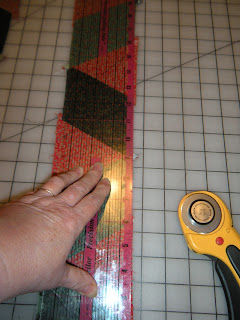
After trimming my strips, I had very little waste.
Pin the points of the light triangles by first inserting a pin straight through the very tip of the light fabric below the seam.
Then add a staying pin to either side of this point.
Align and pin the dark and medium fabrics together, too, at each intersection. Match seams and pin in the light fabric just next to the seams.
Check each strip seam after you have sewn it to see if your points are matched correctly.
The points are not aligned correctly in this seam. I like to take the time now to remove a few stitches, repin and resew, so that I will not have to see my errors after my quilt is finished. I know I am always going to find mistakes in my quilts after they are done and I do not expect to ever make anything that is "perfect," but I like to know I did the best I could.
I carefully remove only a few stitches each side of the intersection.
Then I repin and resew that intersection being careful to keep the same stitching line.
The little bit of extra time I took to resew a couple of seams really makes me happy when I look at my blocks close up.
After all th strips are sewn together, press seams flat. I pressed all in one direction.
Here is my completed Tumbling Blocks, ready for me to add the borders to make my table topper.
For the complete how-to, in parts, click on
Time to sew!
:)


.jpg)


7 comments:
Wow, that does look easier than I thought! Seems like cutting will be the trickiest part. Thanks for sharing this! I may not try it til after the holidays, but I'm definitely bookmarking it til then! :)
A much easier way My Friend. Thanks for the tutorial :)
This has been a wonderful tutorial. This tumbling block technique is loads easier. I will be giving it a try.
Have a great day,
Always, Queenie
Thanks for the nice comments, my friends!
If you try this method, please let me know. I would appreciate feedback on how this works for other quilters ... and I would love to see pictures of your projects.
If you use this method and blog about it, please link back to my tutorial ...
:) Pat
THanks for postin, I am definately going to try this. Traingles are my biggest fear, eek!
Wow - that 3d effect is awesome!
Thank you so much. I dreaded the y seams and knew there was a way to do it without.
Post a Comment