Saturday, November 30, 2013

Double the Blog Hop Fun!

Sew we quilt
 
  Madame Samm has announced two new blog hops for 2014.
 
 
My quilty kitties need a new door stopper.
 
 They have been playing with the one I have and it is looking very bedraggled.
 
So I am signing up for this hop!
 
Carla @ Creatin' in the Sticks
 
is cheering this one!
 
Carla, Please Don't Stop Me!
 
 
Only the fact that I do not have fabric yet is stopping me from signing up for this hop, too ...
 
 
 Madame Samm has some online sources listed Here.
 
Carla is cheering this one, too, and has info Here, too.
 
I think I may have found the fabric I want.
 
Hope to see you hopping into this Quilty Fun x 2!
 
Sign Up Now!
 
:-)
 

Monday, November 25, 2013

A Tale of 20 Blocks


On My Design Wall - Penny Patch Quilt In Progress
(updated) 

I am working on my Apple Pie Penny Patch for this quiltalong ...

Penny Patch Quilt-Along


Here are my 20+ blocks for the Linky Party

Well ... actually I am looking at these blocks on my wall  and moving them around every once in awhile as I work on other things today. 

This is what I had at one point on my wall ... 


(1) Penny Patch - Scrappy 

This is what I had on my design wall after putting up a stack of the penny patch blocks with the 6.5" squares.
Very scrappy.
Scrappy usually makes me happy.
But this is looking a bit too busy-busy to me.
I am not scrappy happy.
Hmmm ... what to do?

While I thought on this, I made a few more blocks ...


 Butterfly helped.


Katniss helped

After studying my design wall, I decided that maybe it was the scrappy low volume and neutral 6.5" blocks that are the problem for me. 
So I took out these 6 blocks ...


... and I added these 6 blocks which were already cut ...


Then with more thought and a little help from my friends I took out the blue.

.. and this is where I am now on my design wall ...


(2) Penny Patch - Focus Fabric - No Blue

I think I like this much better.

I have taken out the blue apple print.  It was not in my original color scheme.  It was a late addition when I happened upon it in my stash, with the apple basket print and I added both when I was cutting.  The apple basket print with the green background is staying.  The blue apple print is too strong and the wrong color and I will save it for the backing or for placemats or something.

I am going to cut more of the light fruit and veggie print (below) which is actually the fabric that started this quilt. Somehow this print is just low volume enough to make the rest of the fabrics work better.

Awhile ago I bought two yards of it from the sale rack at a nearby quilt shop because it appealed to me. This fabric is the one that I used to develop the color scheme for my Penny Patch Quilt. When I started pulling the other apple prints and red and greens and yellows, I decided I had to go back to the quilt shop and see if they still had the bolt, thinking I woud like to use it for the backing of my quilt.  I bought the rest of the bolt, about two and a half yards so I can at least make a pieced backing with this as the primary fabric.

I will be putting at least 2-3 in each row along with the other large squares.


So now I have a scrappy Penny Patch Quilt with a "focus fabric."
Time to sew on!
Also linking up today with
Design Wall Monday @ Patchwork Times

If any of my readers would like to comment with your thoughts on whether you like the

(1) Scrappy
or
(2) Focus Fabric - No Blue

arrangement better, I would appreciate your feedback.

TIA!
Have a Happy Quilty Day!
:-)

Friday, November 22, 2013

Penny Patch Cut and Ready to Sew!


Katniss says, "It is about time! 
Where have you been?
I have been right here in the sewing room waiting for you."

Penny Patch Quilt-Along

The Penny Patch Quilt-Along is in full swing at
and there are some great quilts in the
I best get sewing if I am going to join in!


I am making an Apple Pie Penny Patch quilt.

Here are my fabrics:


I  picked these fabrics a month ago and was ready to go and posted this here in 
  and then while I was waiting for the cutting requirements, I got busy with other projects and these pretty fabrics sat in stack in my sewing room.

This is my color scheme: 


Fabric A - green

Fabric B - red


Fabric C ... pop color ... yellow


Low Volume
(hmmm ... looks like I shall be moving the dark check over to the red/black side)


Fabric N - the squares in the front.

I am making a twin-sized Penny Patch Quilt.


When I fussy cut the squares from the apple pie recipe print,
I had some small pieces left over so I cut them to 2" squares rather than cut a strip
so I could save the remaining print for another project.


Here are my cut 2" strips. 

You can really see the contrast here between the colors and the low volume.
That black/white check is definately getting moved left as it sticks out too much to be low volume and the light green/red print with the white background will be moved over to the middle with the lighter fabrics.


Here are all my squares.

Time to sew!


My 1st 2 Penny Patch Blocks!

Katiniss and I will be in our sewing room.

Have a happy quilty day!

:-)


Thursday, November 21, 2013

Stitchin' Sisters Round Robin 2014


 The "Stitchin' Sisters" Round Robin 2014!

A few of my online quilting friends and I are joining together to do a Round Robin swap in 2014.  This is all being done by small email group so that we can stay in touch and share our progress and what is happening in our quilty corners.

This is going to be sew fun!

I have done two previous Round Robins at The Quilt & Needle Forum and I really enjoy helping my friends build my quilt top.  This is the first time I have done a private RR and I am really looking forward to it.  Only one other of my RR friends has a blog so you will be seeing a lot of RR post on my blog next year and I am be setting up this ...


... in my header bar so that we may use it as an album and a reference.

When I post a picture of someone else's medallion or borders, I will be adding a watermark to the photo to credit this quilter's work.  I hope my readers will enjoy seeing our quilts in the making rounds.  Please feel free to leave encouraging words along the way. 

If you have never done a Round Robin and think you would like to set up your own small group RR, leave a comment or send me an email and I will happily let you know how to get started.

Our RR is starting in January, so we are getting our medallions ready now so they will be already to mail after the New Year.

Here are the first two medallion photos I have to share ... 


 This is Cherie's Medallion

I am really looking forward to adding a bright and happy border to this pretty basket block, but my turn will not be for many months as according to our schedule, I will be the last border that is added to the beauty before it goes home.


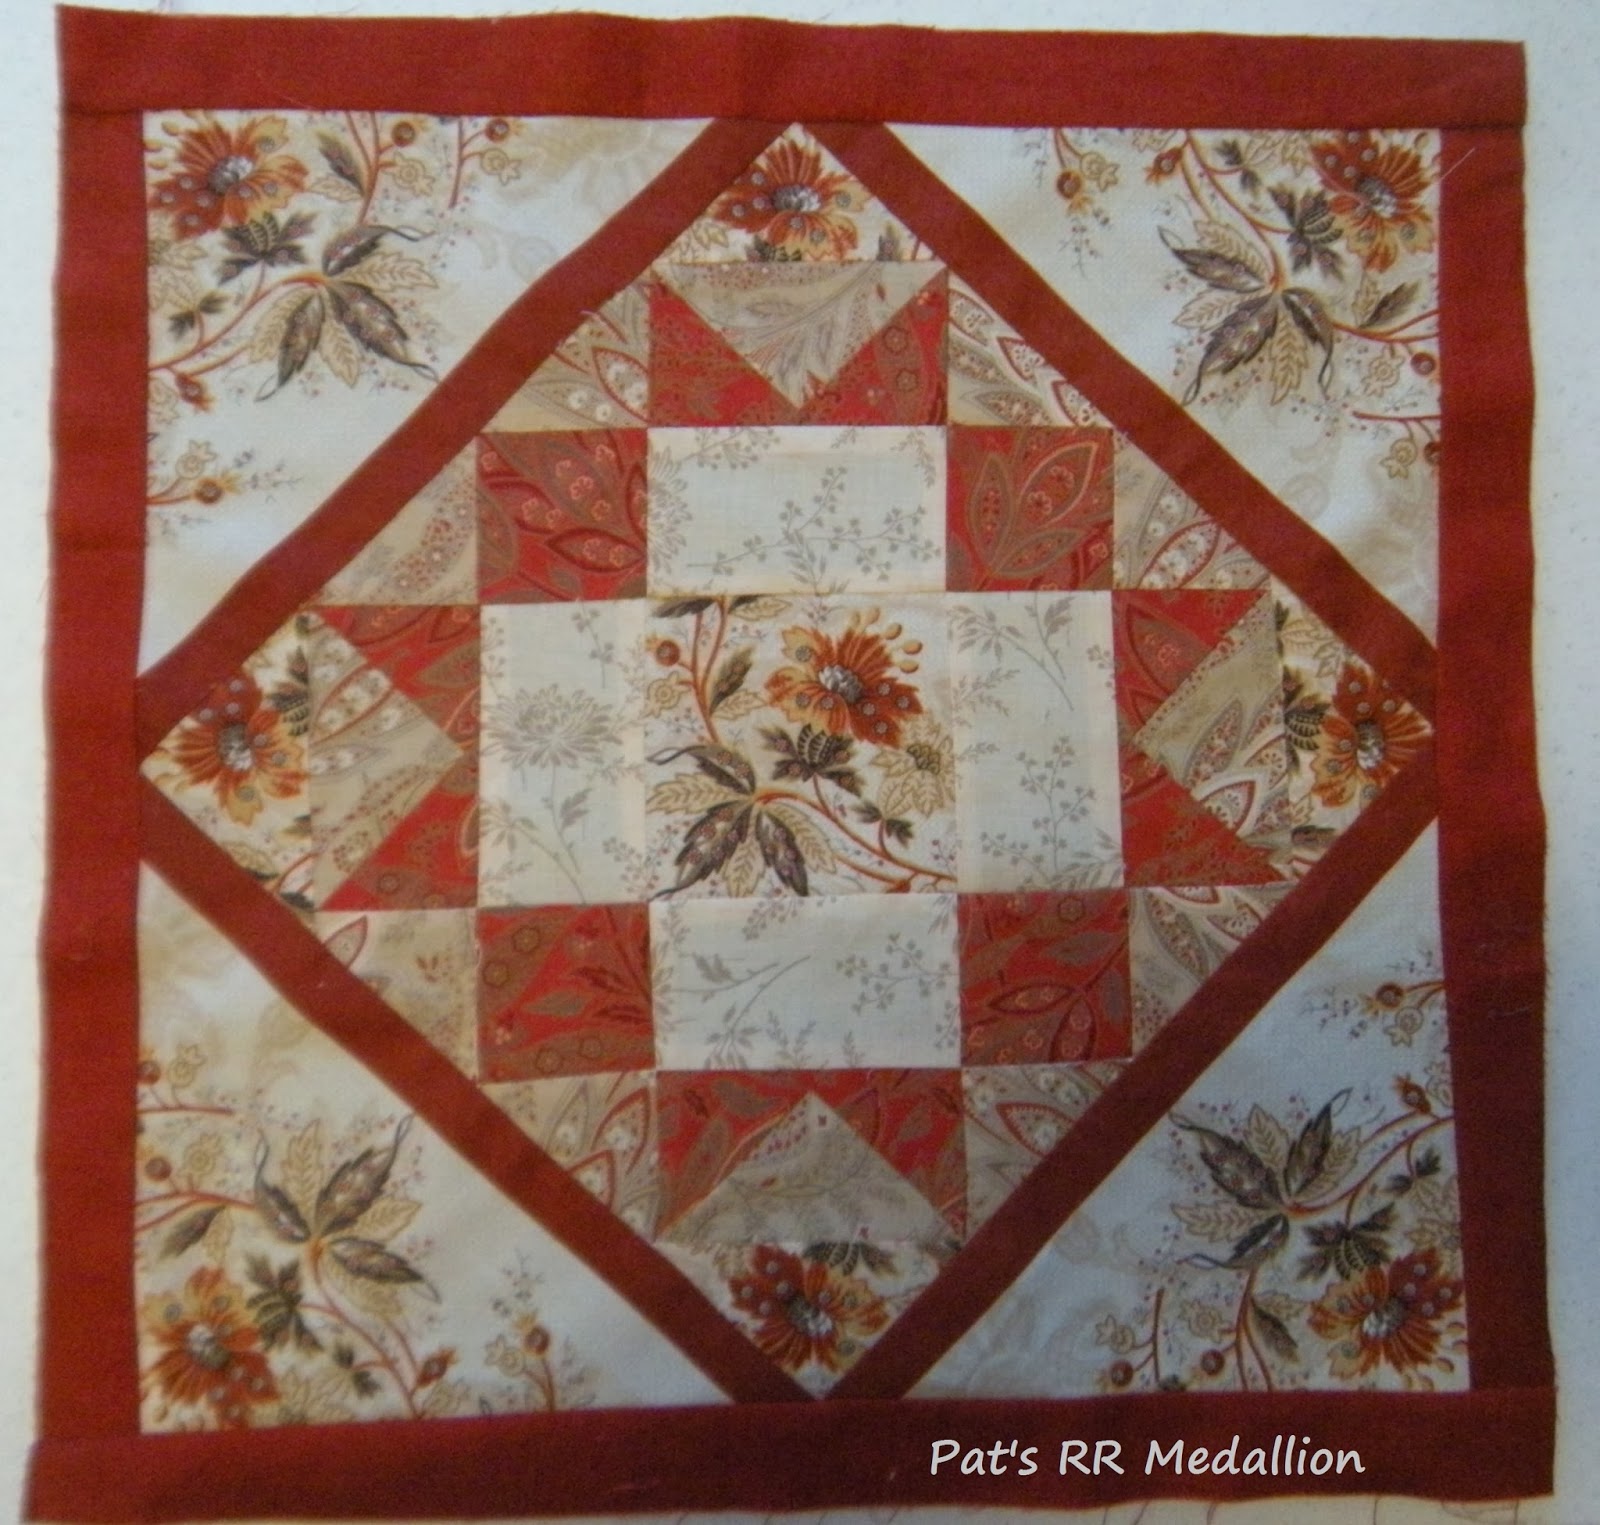
This is My Medallion

Whenever I am choosing fabrics and a block for one of these year long projects, I have a tough time deciding what I want to make for my medallion as I am not the only one who will be working on this.  
First I decided on the center block.


Last year I made this table runner and blogged about it here.   
I really liked the block pattern and think it is a good RR Medallion
It is from a booklet by Atkinson Designs called Confetti in the Corner.
This block and others in the book are made from smaller units that would make good border ideas for anyone who may feel stumped when they are working on my RR.  
I also thought my friends might be interested in the other patterns.  One of the units is called "Chips and Dip" and there are even a couple of pages of dip recipes in this book.  What quilty fun!


Then I decided on fabrics.  This took longer. I have a nice stash!
 I have had these fabrics for a few years.  


I had 2 and 1/2 yards of this great border print called "Splendor" by Jason Yenter
for In The Beginning fabrics.
I also had a few fat quarters from this line and to this I added some red/tan/cream fat quarters that I think are from an older "French General" line from Moda, but I do not know what the line is as there is no selvage markings on my cuts. The other fabrics are tone on tones.  So it shall hopefully be easy for my RR friends to easily find something in their stashes to use for the borders.


I wanted to add a little more fussy cuts from the border print to the center of my quilt so a set it on point with fussy cut setting triangles and added a red tone-on-tone frame.
I am keeping what is left of the border print to add one last border to my RR when it returns home.


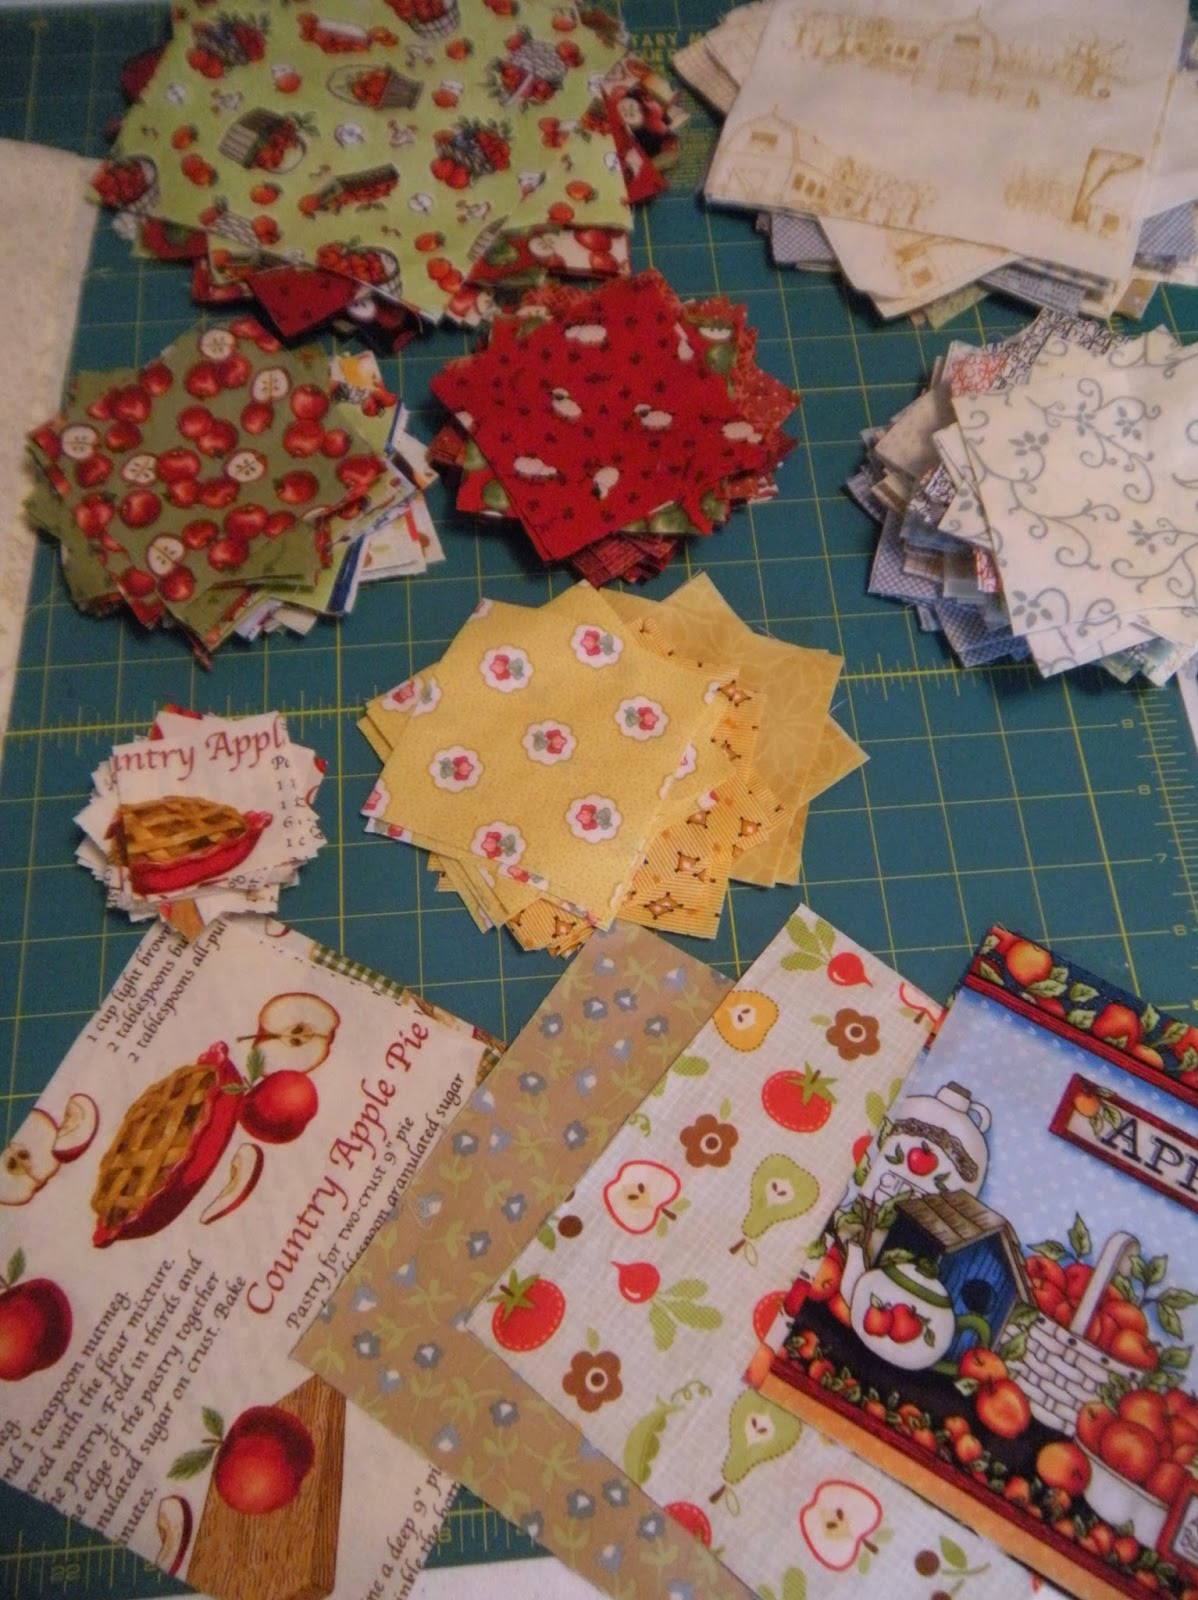
I am enclosing what I have left of the fat quarters and a half-yard of the cream background print to my Round Robin packet so that if anyone wants to use some of it they may.  My friends do not have to use these fabrics.  Whatever fabrics or border idea they want to do will be wonderful.

The beauty of these RR quilts is that they are built round by round by my good quilty friends and each is a unique group fabric work of art.

Thanks to all my Stitchin' Sisters for joining in this RR!

2014 shall be a a good quilty year!

~ <3 ~

Thursday, November 14, 2013

Friendship x and + Swap

x and + Blocks

One day a week ago a post caught my eye at
Jane's Fabrics and Quilts.
Jane was telling about this lovely block swap she had found.

I followed the links to ...


Lolly Quiltz


This wonderful swap is being hosted by

Carla @ Lollyquiltz

and

Susan @ Patchwork Play

Click on either of the blogs above for all the details.


The tutorial for how to make these blocks may be found in this link:
Amy @ BadSkirt

These blocks are fun and easy to make!

As Jane says ... "just one click" ...

and may you be on your way to making a friendship quilt with your
"invisible friend" !

Susan and Carla have offered to help you make a new friend for this swap.

When I read about this swap and thought of all the lovely quilty "invisible friends" that I have made online over the last few years, one name stands out.

So I sent an email to

Dorian @ Ridge Top Quilts 

and said "Will you be my friend?

Happily she agreed!

Dorian and I have decided to make throw size quilts,
8 blocks x 9 blocks.
As the blocks measure 7.5" when finished,
our quilts will be 60" by 67.5" without added borders


We are going to make six blocks per month and send three for one year starting at the end of this month and next year for Christmas we will have pretty new quilts to snuggle under with a good book and a cuppa.

Rather than choose a special design seed palette, we have decided to make scrappy quilts using whatever scrap fabrics we have in our stash. 
After comparing scrap stashes, we have chosen to make our blocks using one gray fabric as a neutral somewhere in each block to give the eye a little rest and tie the blocks together. The other colors we have chosen as guidelines are
green, yellow, pink, blue, orange and purple
with the gray.


Here are the fabrics I pulled from my stash when I was looking for what to use to make my first month's blocks.  There are more than a few Kate Spain fabrics here as she is my favorite fabric designer. The rest are very random selections.  Most of them are less than a fat quarter pieces and some are only strips and will only appear once or twice in my blocks.

For more pictures and info on this swap visit the Flickr Group that Carla and Susan have set up for this swap.

Hope to see you finding a friend and joining in this swap!

~ <3 ~


Wednesday, November 13, 2013

Saturday, November 9, 2013

Waking Up With Kona Color!

I <3 Kona Solids!
 
These were made using the
 
 
that I blogged about
 
 Here
 
This has been my most popular blog hop post ever and was featured last June
on  facebook


 I love sewing with Kona Solids! 
 
 
So today I woke up to the announcement of this wonderful new hop ...
 
 
@
 
Sew We Quilt
 
I was sew happy!
 
Sign up now
to join in this fun and start the New Year off in
colorful way!
 
I am sew looking forward to it!
 
:-)
 

Thursday, November 7, 2013

Quilting In Progress

Quilting in Progress
 
 
I have almost competed the quilting on the
 
 
and hope to be sewing on the binding later today!
 
In the photo above I have completed all the straight line grid and in the ditch stitching that I did in the center of the quilt and I am onto the border.

  
To do this on my home machine, I remove all the safety pins that I had around the edge and I replace them with regular pins.  I pull the top and backing nice a flat and pin all around the outside edge of the quilt and then I run a line of stitching 1/4" from the edge of the top, removing the pins as I go.
 
I like to stich around the edge of the quilt when I am get to the border as I feel this holds the backing smooth and in place and it helps to make the quilting lines in the border pop.
 
More pictures later!
 
May you have a happy quilty day!
 
:)