Thursday, January 31, 2019

My LOVEin Heart


My LOVEin Heart 

I loved this sew along idea and posted the pattern link HERE


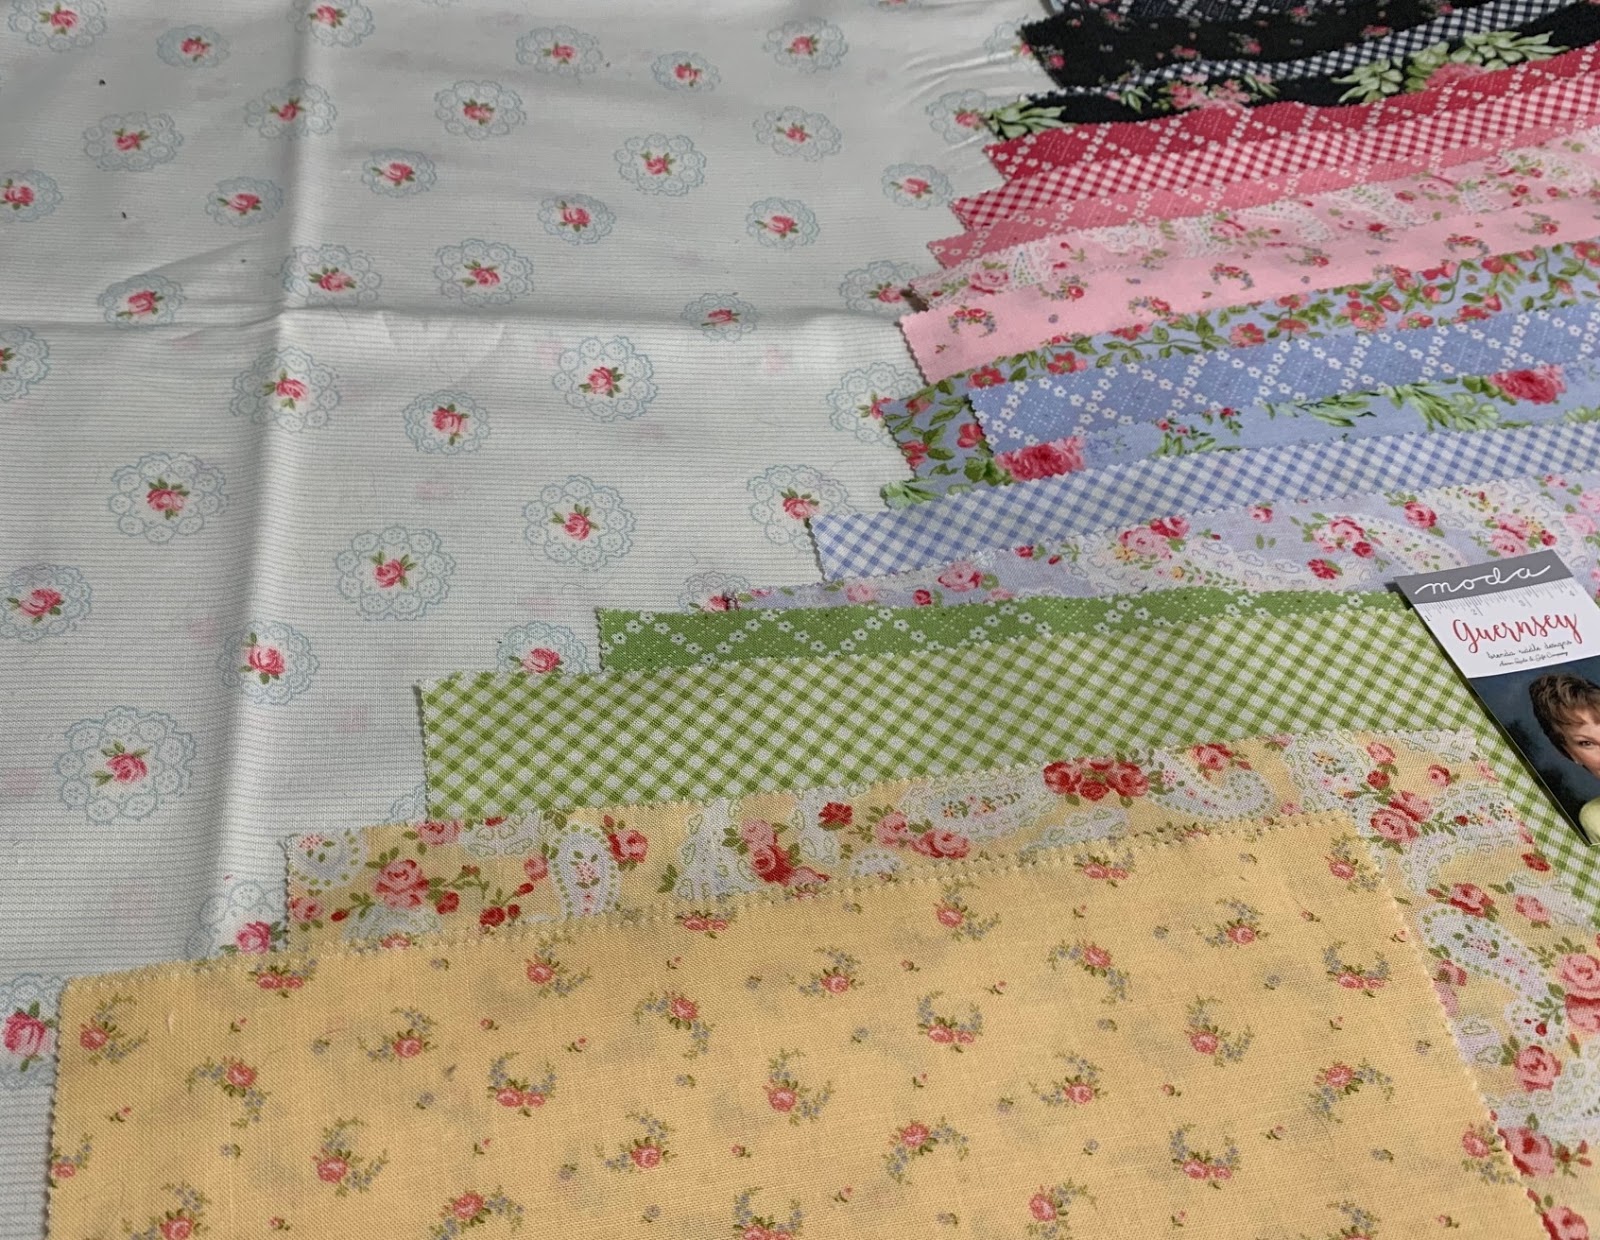
Found some fabrics to sew along HERE


Fell in love with this creative


Went back to the fabrics to look for  red for the heart 
and a pink for the star
and decided on the red dot for the background.


Played some more with the design and the fabrics and the kitties HERE


Master Quilt Kitty Katniss supervised on this one.


Together we decided on these fabrics,
adding the gray mottled crackle for the border points
to bring out the gray in the print
and make the heart stand out.
The small heart print on the left will be the binding.


Played some more with the layout and the kitties.


Did some sewing.


Here is my completed top!

My top measures 42" square 
including the 5" floral border.

I used the charm quilt size pattern

Here is what I cut to make the heart variation:

Background Fabric (Red on White Dot):  
12 squares 4 and  1/2" 
9 squares 5" for the Half Square Triangles
1 square 5 and 1/2" for the Half Quarter Square Triangle

Center Square (Floral) 
2 squares 5" for HSTs

Heart Fabric (Red) 
6 squares 4 and 1/2 "
9 squares 5" (HSTs)
1 square 5 and 1/2" (HQST)

Center Star Square Fabric (Pink)
6 squares 5"  (HSTs)

Outer Star Points (Gray Crackle)
6 squares 4 and 1/2"
11 squares 5" (HST)
1 square 5 and 1/2" (HQST)

Border (Floral)
4 width of fabric strips 5" 

I am really happy with this one.


I had intended to use the Hello Sweetheart Charm pack
and the scrappy version of the original layout,
but this has now been saved for another project.

Love my stash! 

Hope to be quilting it soon!

:-) 


Wednesday, January 30, 2019

Think Spring! ~ Think Strings!


When I first saw this logo, I thought it said "spring"
before I realized it says "strings."

It seems this bitter cold has my mind dreaming of warm days and spring flowers.

So maybe my project will be a "Spring String Fling." 

What does this make you want to sew?

Show and tell in March ... 


This colorful blog hop is hosted by the lovely


Think Spring!  Think Strings! 


Tuesday, January 29, 2019

Sewing ~ With Cat ~ Part 2 ~ Plus 1


My Quilty Kitties and I are working on something ...


... "sew pawsome"!


Nutmeg helped me choose the right fabrics. 


Maestro helped me work on the placement and the design.  

Such good sewing room helpers I have. 


Together we actually did get some sewing done. 


Maestro says "Time to play with the kitties."

We hope to have this project ready to show you tomorrow.

It is getting very cold here.

Not as cold as the midwest,
but the arctic blast is spreading into the northeast.

Stay warm and safe and quilty, everyone. 

<3 


Monday, January 28, 2019

Sewing ~ With Cat


See the look in those eyes that say "Mine!"

See those claws?


See those little sharp teeth?

Maestro and I are playing with these pretty fabrics today ...


We are working on a project I am not supposed to show until Valentine's Day.

If you are working on it, too, you are probably wondering 
what part of the pattern called for this cut.

The answer is "No where."

I am doing my usual obsessive, compulsive thing 
where I have to put my own twist on the boxed design.
I actually prefer to call it "being creative"
but it is what it is.


The cat knows and she is watching.


Maestro is doing her own thing.
She is guarding her fabric.


This cat is not sleeping.


She has one eye open.


Ready to snatch her fabric back if I try to move it.

Maestro is actually a very gentle cat and she never uses her claws or teeth with me.


Maestro is just playing with me.

We are good buddies and love to sew together.

<3 

Sunday, January 27, 2019

Hello, Sweetheart ~ Come into my Sewing Room


Hello, Sweetheart ~ Welcome to My Sewing Room

It is a happy place ... :-) 

Especially now that you are here. 


Now what shall I be making with this cute fabric?

What would you make?

:-) 


Saturday, January 26, 2019

Wonky Improv HSTs Scrap Block


My wonky improv
 "Confetti Scrap Block"
12.5" square block

This is my newest endeavor to conquer some of my scraps.

This block is inspired by my online quilty friend, 


who made a perfect "Confetti Block" to use up leftover HSTs.


I loved her block idea. 

When I cut these triangles off snowball and other units,
I can never throw out the pretty HSTs
So over the years, I have made many pinwheel and broken dishes 
and other HST blocks.


When another stack of cut-off red and white HSTs, 
in three sizes, landed on my machine bed,
I decided it was time to make my own version of an
"improv"  HST Confetti Block.


I added scrap solid white strips to make the different size HSTs work together.


I decided to make units that  
 were 2 and 1/2" or  4 and 1/2" 
and trimmed and squared as I sewed.

I added some other scrap red triangles,
some as small a 1,"  until I had a enough pieces.

Then I sewed into 12 and 1/2 inch rows.


Five rows, 2 and 1/2 inch wide by 12 and 1/2 " long,
 made a 12 and 1/2" unfinished block.

My "15 minutes of play"  was more like and hour of play
but I always enjoy using up off bits and pieces.

My block is a bit wonky and points are cut off in places
while trying to use up smallest scraps
 but I am going to continue.

I am going to make more of these with my HST leftovers and hopefully will
have enough for a bed size "Confetti Quilt" someday.

This is my 2019 Rainbow Scrap Challenge plan.


Rainbow Scrap Challenge 2019 @ So Scrappy

I always find so much inspiration in the links in this
wonderful scrap party!

Hopefully I will actually finish a quilt this year.

Each year I try and each year I end up with another UFO

I have decided even if I only make one block a month I will have
a lap size quilt by the end of the year.

Here's hoping! 


Friday, January 25, 2019

Moda LOVEin' Sew Along

Three sizes

Layer Cake ~ 72" Square Finished

Charm Pack ~ 2" Square Finished

Mini-Charm ~ 12" Square Finished


Which size will you sew? 

  Moda Fabrics on FB

This is a good scrap stash pattern, too! 

<3 <3 <3 

Thursday, January 24, 2019

Quilty Sleuthing


This quilt was made by Lori Q Alison 
(tag added by me to credit her work)

It started with this beautiful, then mystery quilt, 

I tracked this lovely quilt to Lori Q Alison's Facebook Photos


Then @cocoaquilts found and posted this original quilt
by Tina Lewis called "Modern Spools" 

The thread trail led to 


The  search was still on for the pattern.

I knew I has seen this quilt somewhere and my curiosity
and quilt sleuthing skills were off and running.


I found the original pattern here!

It is in


Oddly, this is a paper-piecing issue 
,
but the Modern Spools Quilt is not paper pieced.

Mystery solved.

I had this in my computer all along.

Not quite forgotten.

I think I need to make my own version of this quilt!


Wednesday, January 23, 2019

Dither ... Dither ... Dither


The fabric squares are Gurnsey from my treasured stash of


I need to choose a background fabric.

This can be so difficult for me. 

After going through my stash 
I found these four possibilities,
in terms of yardage and colors.

(A) upper left ... gray dot
(B) lower left ... blue doily fabric from Caroline
(C) upper right ... aqua dot
(D) lower right ... Kona Snow

The pattern  is 


I will be adding the browns from the Caroline bundle 
for the beaks of the birds.

I took (A) the gray dot out 
right after I took the first photo.
No rainy sky for these pretty birds.

Remaining choices ... 


(B)  Caroline Blue Doily
This was my original thought. 


(C) Aqua Scattered Dot 
This is a new acquisition. 


(D) Kona Snow
This is an old reliable staple in my stash.

Sorry the photos are gray
It is a gray day here, rainy and the snow is getting slushy for a day 
or two before we freeze again.

I am sewing the red and white fabrics as I dither. 

Which would you choose?

Suggestions welcome ... :-) 

Tuesday, January 22, 2019

Stitch and Sew X Factors


I am a 2,
both drawing and stitching.

I saw this first in a Cross Stitch FB Group 
where I am a member:


Where apparently I am odd because I actually draw and stitch both the same way.

Apparently I am also "scary" and a "freak" according to many of the comments 
on the original Twitter Post. 

Do I care?

Not at all.

I am not social media person or follow trends.
Nor do I usually watch the Today Show.
If you are interested in more on this X story google it or 
... where someone actually says
"I don't know anyone who starts from the bottom."

Hmmm .... I do.
This guy does not know me.

My hubby, who more typical when it comes to drawing x's,
suggests maybe it is so I can see my work.

This makes sense to me. 

My hubby knows me ... <3 


I do care more about the fact I am not getting my 


accomplished.

If you compare photos from these two posts
you will see I have not been cross stitching.

I was going to stitch during the football games on Sunday,
but the games were so interesting
and kept my attention focused on the play.


I have been sewing.

Maybe I do not care enough not to play with 
my sewing machine .

Either way I am happy and stitching in my happy place.

Hope you are warm and safe and happy
crossing your x's. 

Monday, January 21, 2019

Black & White Blog Hop ~ My Day!


Flannel and Fleece Winter Slipper Boots

for the 


Winter can be bitterly cold in the northeast.
Last night and today is one of these times. 
After snow and ice, it is sub-freezing.

It was -2 degrees Fahrenheit when I woke up this morning.
That is -18 degrees Celsius for  my international friends.

Today we are chipping ice off the steps and walks.

We keep the temperature low in the mid to upper 60s F in the daytime
and turn it down to 62 degrees  at night.
Our feet can feel very chilled.

Most of our floors are wood or laminate and many 
socks and fabric bottomed slippers can slip
and potentially cause falls,

So when I decided to make warm flannel and fleece boots for indoor wear 
I needed to get creative.

I started with this 


and made it better ...

by adding no- slip soles!

For the batting layer I used 


Fusible Fleece

and pressed it to the faux fur fleece for stabilizing this stretchy fabric.

The pattern directions were ... um ... okay.

In other words, I had one night of seam ripping  on the first boot where I almost
tossed the project and sewed an easy flannel quilt instead.

Here are my lessons learned:


When the pattern says sew from "Mark 1" 
to the "Center Back" seam ...


... it means sew the top seam,
leaving the bottom open.


Then sew the upper curved seam of the outer fabrics,
right sides together on the top of the foot
from Mark 2 to Mark 1.


Then sew the top of the foot lining fabrics,
right sides together,
from Mark 2 to Mark 1


The bottom seam will be open 
to sew to the completed sole units 

Here is how I made the no-slip soles:


I cut three pieces for each sole,

1) flannel (this will be the inside layer
to be soft for the foot.

2) Soft and Stable White Stabilizer By Annie 


3) the no-slip sole ... 
for this purpose I cut the outer sole pieces from


This shelf liner material

It is the same stuff I used in my very popular


The heavy duty built in walking foot on my Janome
has no issues stitching this rubbery synthetic shelf liner
or these three layers together 1/8" around the edge.


To sew the top to the soles,
place the flannel right side to the no slip sole side
and, starting at the heel, 
sew around the edge with a 1/4" seam
easing around the curves.

I did not pin or clip;
I just held the layers together as I sewed.
You may want to pin if you are not experienced
with sewing curved seams.

I hope you have enjoyed this project.


My hubby really liked this one.
Just as I was finishing the second boot,
he came into the sewing room and took one look 
and asked me to make him some.

I am going to have to figure out how to enlarge the pattern soon.

These will make good gifts.

Be sure to visit all the wonderful stops today! 


Monday, January 21st

Just Let Me Quilt

Needled Mom
Tu-Na Quilts, Travels, and Eats
Life in Scrapatch (you are here)
QuiltFabrication
Scrapdash
Bumbleberry Stitches
keepsake moments
Vroomans Quilts


Thanks to
Carla @ Creatin' in the Sticks
for organizing this fun hop!

 Carla is hosting a great giveaway


Happy Blag Hopping!