Saturday, October 31, 2020

Happy Halloween!


Happy Halloween Quilts!

I am enjoying my Halloween quilts and such this cold and frosty Halloween. 

I did not get a new Halloween quilt or project finished this year

but I have plenty to make my home festive. 


The snow is on the pumpkins Here in the northeast
and there is no trick or treating this year by city decree.

Mr Scrapatch and I are treating on these tasty

Ma-Ka-Rohns 

which I ordered online.


This one is "Butterfinger" from their special Halloween box
which are candy inspired.

These are very, very tasty!

I could eat the whole box in sitting but we are saving and savoring them
one at a time and will share with our family tomorrow.

I think these may become a holiday tradition in our house
as I see a yummy looking Thanksgiving box is now available.
If you want the Halloween ones, you best order quick in the link above
as they will be going "poof" in a few hours.

May you and yours have a Happy and Safe and Healthy Halloween!


Friday, October 30, 2020

Winter Comes Early


Winter has come early to my quilty corner.

This is what greeted me when I opened my back door this morning. 

It is still snowing.


Mr Scrapatch ventured out to put seed in the feeders before he left for work

and this was the snowy path that greeted him.

This is a photo he took of his Saint Francis statute on the way to the shed for the birdseed.

The leaves are still on the oak trees, just starting to change and drop.


I took this one of the snow on the last of my coral rose buds 

that were getting ready to open. 

I am still hoping they will bloom.


Nutmeg was amazed by the snow and sat in the doorway 

watching the birds fly in to feast on the feeders. 


This is the winter wonderland in the front of the house 

that my hubby took as he left to work.

He arrived safely though he said the commute was not much fun.

I am snug inside and thankful today.

This is my favorite winter herbal tea.  

TeeKanne Forest Fruits Tea Bags

It is getting difficult to find as it may have been discontinued. 

I have about a half a box left and am hoping to find more.

My daughter originally found it in a small shop that specialized in German foods.

This box was the last of her own supply and she sent it to me last year.

I may have found some on Amazon, but when I tried to buy some there last year

it never arrived and I had to get my cash back. 

If you know where I might purchase it, please let me know. 

I like to add a little orange juice, a splash of lemon juice, 

a teaspoon of honey and a sprinkle of cinnamon.

mmmmmmm!

Really warms me up on a cold wintery day.

We have three inches now outside my kitchen window.

I am staying in today.

All the lights are on to light me gray and wintery sewing corner.

I am happy and blessed.

May you and yours be safe and well today. 

<3 


Thursday, October 29, 2020

I Like Thursday # 71 ~ Keeping My Face to the Sun


Good Morning and Happy Thursday!

I am joining the fun with my friends at

I Like Thursday @ Not Afraid of Color

where once a week we choose to find and share happiness.

It is very gray and rainy and cold enough that snow is in the forecast here in my quilty corner.

It is a small piece of weather.

I always like to turn my face to sunny thoughts and and my happy place.

That is why I am posting this photo today.

This is a fabric panel.

It is from a new fabric collection,

The yardage and panels are just reaching the shops 
and the precuts are soon to follow.


I love sunflowers and the colors in this collection.

The designer, Robin Pickens, has a lovely Video Here
showing the complete collection and several patterns. 

I really enjoyed all the sunny fabrics and quilts and would like to make them all.

I shopped the internet and found the yardage and panels at a good price at


I am not affiliated with this shop.
I have purchased from them before and have been pleased with their service.
You will find this fabric arriving in many shops which feature Moda Fabrics.

 I will be posting photos of my new fabric soon after it arrives! 


I do already have this gorgeous calendar by the same designer. 
I saw this 2021 calendar online at Amazon and snapped it up.


The artwork is bright and beautiful.
This is a favorite quote of mine.


Here is the back of the calendar showing the monthly pages for 2021.
I a looking forward to hanging this calendar to brighten my sewing corner 
even on cloudy days. 


There is also a daily desk calendar and I have two of these on order,
one for me and one for a gift.


 I have been happily working on small quilt with this pretty fabric 
which I posted last Thursday.


It is a fun and easy pattern.


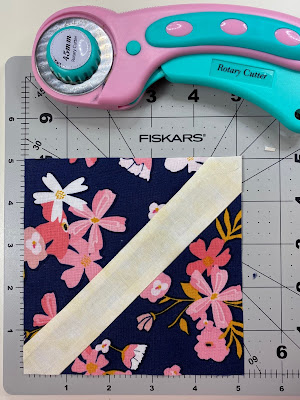
Here is one of the blocks.
More photos soon.


Since I often make sourdough bread on Thursdays
so we have fresh bread for the weekend,
I also have  bread dough from my sourdough starter 
on the dough hook 
in my bright orange kitchenaid mixer. 


Now that the weather has turned cooler,
Nutmeg and I have been snuggling under the quilts a lot.
Nutmeg likes to "tent" under the top quilt and cuddle.

May you and yours have a happy and quilty Thursday.
Be well and Be Safe.
<3 

Wednesday, October 28, 2020

From the Heart Blog Hop ~ My Day!


I am giving gifts to family and friends and others
this season that show how much I care. 
Quilty Kitty Katniss is helping me.


To make my Fall Gift Masks I followed my 


and I added a few new materials to my masks
to increase their protection and breathability.


These are my mask making supplies.

Here are new additions:


and


I bought these at


Here are the pieces for the mask shown on the bear in the top photo.
For this mask I made the top elastics longer than the bottom ones
as this makes a comfortable fit for wearing over ears.
This photo shows the nose wire pocket added to the top center inside of the front fabric.


I chain sew the nose wire pockets and cut and twist the end the plastic covered craft wire
so they will not poke through the fabric.


I sew on the nose wire pocket with a 1/8th inch seam to the inside of the front fabric
for all the masks I am making before proceeding to the final assembly.


I add the four elastics to the back patch before sewing it to the front.


When I top stitch around the edges of the mask
I carefully add the elastics to the side.


Here is a finished mask.
This one has wide elastic of the type that is used for baby's hair bands
and it is soft and does not get stretched out.


This one I made special order for a person who ears hearing aids and eye glasses
and cannot wear the elastics over the ear as it tangles with the hearing aids.
This one fits comfortably under the ears and the nose wire keeps it snug at the top.
The person who will be wearing this one must wear a mask all day at work
and requested these modifications.
The elastics are the same length and the back patch is small.
It fits snugly without being too tight.


The additional sewn in washable filter layer makes the mask look a bit bulky
but it actually makes the mask quite comfortable and easier to wear.
The polypropylene filter and antimicrobial backing fabric 
are very breathable.
I highly recommend these added protective fabrics. 


Here is my well dressed bear ready to gift some hand-sanitizer and a mask to a friend.


Here I am wearing a fall mask that I gifted to me
and wearing it is a gift to others. 
This is my personal favorite and most comfortable mask to wear for fall. 
I wore this mask recently to go for my annual physical.

I have more tests and doctor's appointments on my calendar.
The Covid-19 threat in my area is red again.
I am being careful and taking care of my health. 


One of the people I made a mask for requested that I add 
a nose guard tab to the top of the mask
so that it might fit better with their eyeglasses.


For a tutorial on how I added the top flap with a wire
scroll down to my next post or Click Here


Please visit all my friends today to see what they are gifting:


Thank you to 


for organizing and hosting this fun blog hop! 

I am always trying to improve the protection and wearability of the masks I make.

I would love to hear how you have made better masks.

Thank you for sharing! 


Katniss says, "Have a Happy Fall and Holiday Season 
and have a wonderful time visiting 
and sharing with family and friends.
May all of you be safe and well!" 


Tuesday, October 27, 2020

Mask Making ~ Adding a Wired Nose Tab


This is my prototype for a Mask with a Wired Nose Guard.

I designed this as I sewed and made adjustments along the way.


These are the materials I used:

Front Piece ... 6.5" by 9.5" of  focus fabric 
Back  Piece ...  6.5" by 9.5" of antimicrobial polycotton fabric
Filter Piece ... 6.5" by 8" Mountain Mist polypropolyne fabric

Neck Piece ... 3" by 5" focus fabric

Nose Guard Piece ... 5" square focus fabric

Nose Guard Wire ... 5" plastic coated craft wire

Neck Elastic Pieces ... two 5" pieces and two 6.5" pieces

Sewing Steps: 


I folded and sewed tube for the back of the neck piece

and folded and pressed in the edges 

and inserted the elastics in the side openings

and top-stitched around the back tab.


To make the nose guard, 

I used a needle nose plier to turn in the cut edges and the wire

and I pressed the 5" square in half.

I folded the triangle right sides together and sewed a partial seam,

starting at one corner and ending and back stitching 

so I could make a pocket for the wire.


I turned right side out and turned the open edges in and pressed.

Then I inserted the nose wire with the curve towards the top point 

and the ends toward the long fold.


Then I carefully topstitched around the edges to close the opening. 


I stay-stitched the noseguatrd pocket with a 1/8" seam

to the top center front of the mask,

taking care not to catch the wire inside with my stitches.

Then I inserted the elastic in the sides and top stitched all around.

closing the ends and securing the elastic.


I layered my mask materials with the filter fabric centered over 

the triangle nose guard on the back of the front fabric

and I placed this on top of the antimicrobial back fabric, front sides together,

and made a tube by sewing the top and bottom seams.

Then I turned the tube right side out and pressed only the open ends in,

being careful not to apply the hot iron to the middle as the heat will melt the 

polypropylene filter fabric. 

I pressed the triangle for the nose guard upward before I sewed. 


Then I folded the triangle downward and topstitched a short line of stitches

in the middle to keep the nose wire in place.


This is the front of my mask before I added the pleats.


Then I added the side pleats to shape the mask.


This is my completed mask.

It is very breathable and comfortable to wear.

It can be pulled down around the neck and worn as a accent scarf

when not in use.

I like to put it on before I go out and wear in down in the car or when I am alone in the back yard and pull it up when I am with others.

Wearing a mask has become second nature to me,

an essential garment and pretty to wear.

I hope you find this tutorial helpful.


Below is a link to a more detailed photo tutorial with the neck straps

Free Tutorial for Masks with Neck Straps Posted Here

If you have any questions, please email me at
scrapatches@gmail.com

Have a Happy Day!