Tutorial for making the quilted, hooded
featured in my
Any small quilt may easily become a cuddly bath wrap!
Here is how I made this one for the my grandbaby-to-be:
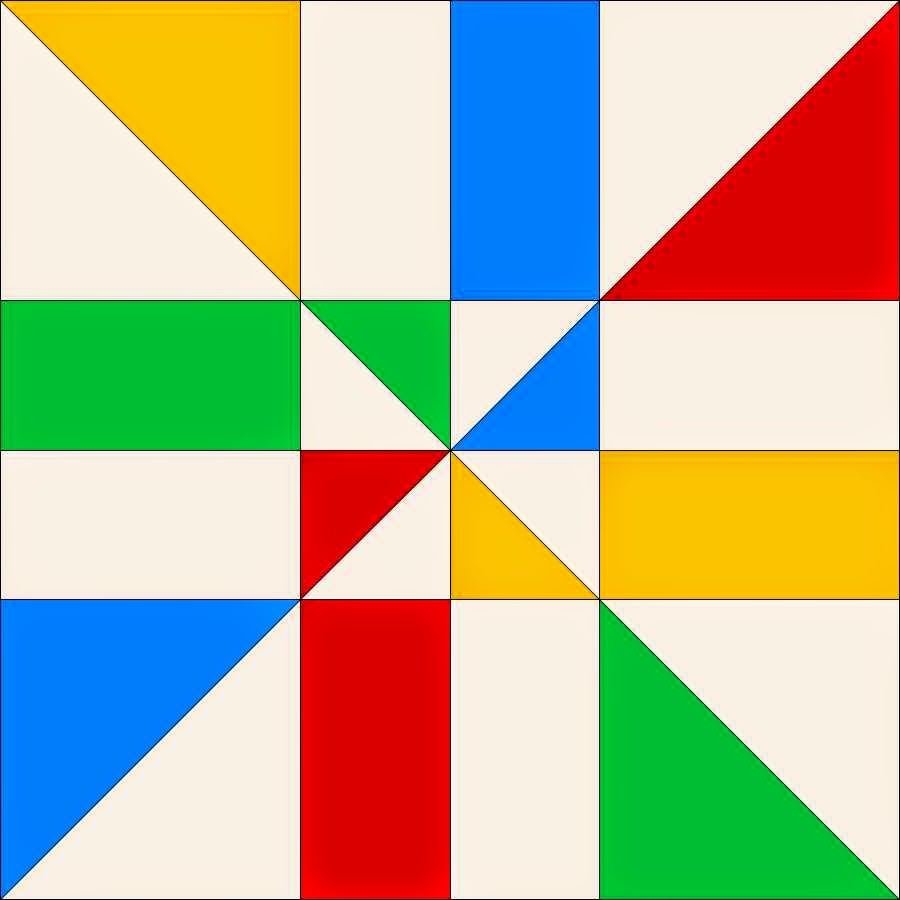
I started with my bright "Spindrift" Quilt Top
This top is 40" square without the outer border
that I will add to round the corners.
Wrapping it up!
I decided to add a 3" Kona white border to the top as I wanted to cut curved corners
and did not want to cut into the pieced top.
I selected Minkee for backing, no batting, for softness and good drape.
Soft terry cloth would also work well.
No batting.
This makes the bath wrap easy to use and easy to dry
I used left over strips to make a pieced binding.
I got ready to add the white border to the top ...
STOP!
I realized that the white Kona in my stash is WASHED!
I did NOT WASH the precut charm squares and jelly roll strips
that I used to piece the top!
Minkee does not shrink.
Uneven shrinkage alert!
I had to WASH the top!
No problem!
I added a line of stay stitching 1/8th of an inch around the top.
I washed it gently in the sink and hung it to dry overnight.
A note about prewashing Minkee:
I have never pre-washed minkee as I was told years ago by someone who did
that the cut edges will shed and make a mess in the washer.
So I took her word for it.
This is what I made while the top dried.
I like to make a small "test" project of these ideas before quilting,
so I put a white border on an extra pinwheel block and added the minkee backing,
wrong sides together.
I stitched in the ditch outlining the blocks with white Aurifil quilting weight thread.
Since I intended this to be a washcloth, I decided to make a self-binding by folding over the minkee and stitching it to the front.
This binding method could also be done on the hooded wrap.
back of washcloth
front of washcloth
washed, dried and pressed top
pinned
If you have never quilted a quilt with this type of cuddle fabric for the backing, give it a try! It is very easy. Pinning about 6-8 inches apart is enough
to keeping the back smooth.
I personally never use basting spray so I cannot say if this is an option.
Time quilt the quilt!
For this project, I stitched in the ditch with my walking foot as I wanted to keep the color block look of the bright color triangles and squares.
detail of SITD quilting
This method also means that every intersection has two lines of stitching over it so that is will last through many baby baths and spins in the washing machine.
It can be hung and it will dry quickly or it may be machine dried on low heat.
Making and adding the hood
To make the hood I cut a square of minkee. and folded it in half diagonally.
I tried two sizes, one 14 inches and one 18 inches square.
I opted for the larger square for my quilt as it was better proportionally.
This makes my hood measure about 22 inches diagonally across the top corner of the quilt and it measures about 9 inches deep to the rounded corner.
To make the hood I decided to bind the folded edge to give it a little more stability
and make it easier to handle and keep the minkee from flopping over the baby's face.
I added this strip of binding before I attached it to the quilt
and folded it over the edge and sewed it down.
cutting the curved corners
The hood was on the back for cutting but I decided to switch it to the front.
I easily folds either way.
Cutting the sides
For this wrap I cut the front and back even at the sides
because I wanted a very narrow binding.
Attaching the pieced binding to the front
easing the curves without pins.
The binding is 2.5" strips folded evenly in half and stitched through all layers.
This makes a very secure binding.
Machine sewing the folded binding to the back.
I used a few pins on the curved corners in the binding.
The hood folded to the back.
Hooded Baby Bath Set,
w
ashed again and ready for gifting!
May a little loved one in your life soon be enjoying
one of these cuddly bath wraps, too!
For a quick and easy hooded bath wrap, you could use a favorite piece of yardage on the front and quilt it to the backing fabric. My daughter and SIL have chosen a Baby Safari Animal theme for their nursery and I am thinking to make a few smaller baby wraps using this method with a baby animal print on the front and a bright minkee on the back.This wrap is fairly large. I had big babies and it is looking like my daughter may be, too. My babies grew out of newborn size so fast that I never used them and gave them away.
A new mom can never have too many blankies and cuddly wraps for a new baby.
I am working on writing the easy pieced pattern for this "Spindrift"
quilt design into a whole quilt pattern,
with fabric requirements for multiple sizes,
which will be for purchase.
It is my first attempt at pattern writing and a new endeavor for me.
Wish me luck!
I have three friends who have graciously offered to test this pattern for me.
If you are interested in this pattern please let me know and come back again soon.
More info coming!
:)