Showing posts with label Free Quilt Block Patterns. Show all posts

Friday, February 1, 2019

The Sew Incredibly Crazy BOM for 2019


I am sewing along with 
A Time For All Seasons Block of the Month
Here is my
February ~ Pieced Block


from 


Blocks are free for a month so save them now!

For reference bookmark the 


Join in the fun and see all the blocks and read all the announcements on their

In some past years I have been a designer for this talented group.

Last year the commitment was feeling stressful 
and my friends took on my last month's block.

This year I am just sewing along with my friends.


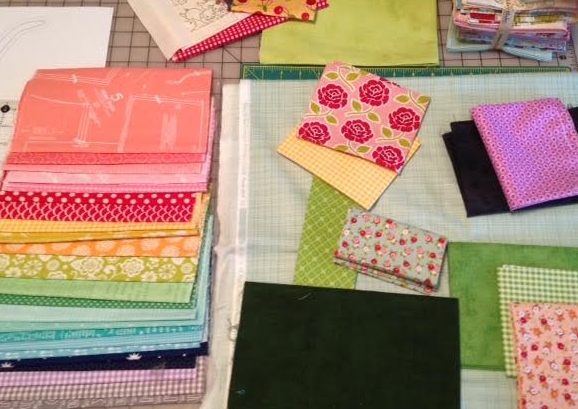
I pulled his bundle and other fabrics from my stash to start.


This  bright and pretty fat quarter bundle is 
Simply Happy from Riley Blake.

For those who may be interested,
this bundle is on sale at 
Precuts of the Week @ Fat Quarter Shop
(affiliate link)

I will be adding other bits and pieces as I see and sew the blocks

The cute appliqued Hedgehogs block is next on my list.

Hope to see you sewing along, too.

Tuesday, March 21, 2017

My QQQ Star Block


Here is how I made the star for 


for my Quilt Quasy Queen banner and mug rug.

I designed this nine patch star block to match the one my daughter put on my mug.

For each block:


cut

5 squares 2 and 1/2" purple
8 squares 1 and 1/2" purple
8 rectangles 1 and 1/2" by 2 and 3/4" yellow


Sew corner squares on small rectangles 
to make mirrored pairs.


Press the corners in alternate directions to easily nest seams, 
cut corner seams to 1/4 inch 
and sew.


Trim star points to 2 and 1/2 inches square.


Here are the trimmed and pressed units.
Sew together as for a Nine Patch Block.


The star center measures 6.5" unfinished.


Add 1 and 1/2 inch strips to alternate sides.


The bordered block measures 8" unfinished.

Enjoy! 

Tuesday, February 23, 2016

It's Toady Time!


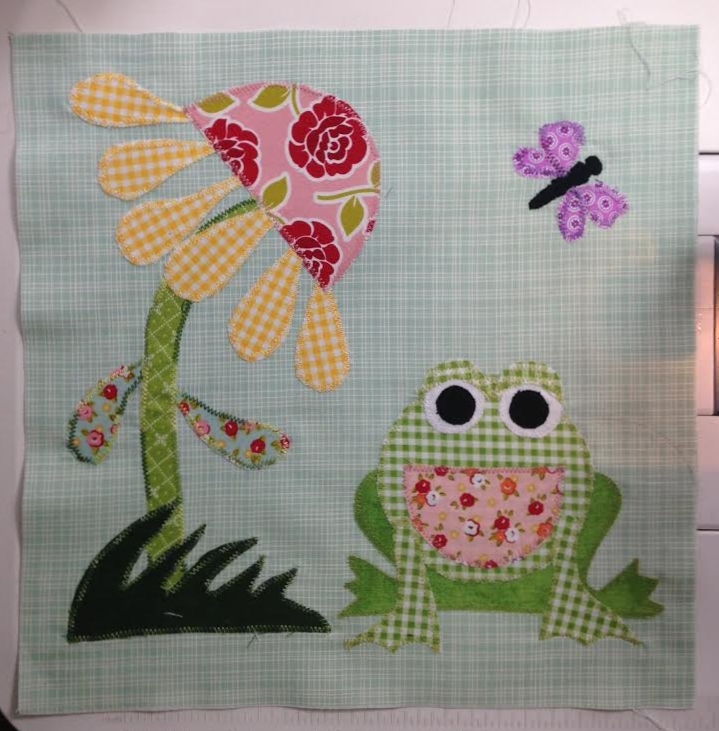
Applique Block 1 Done
for the


@ 


I had sew many beautiful fabrics from


to choose from!

I took my time playing with these and decided on fabrics, colors and placements.

I also made a small design change and decided to make a butterfly instead of a fly.

I decided it had to be purple, a colors that does not appear in the pretty
 Farm Girl fabrics.
No problem, though.
I have a lovely collection of Riley Blake brights 
to add to the quilt ... :)

Then it was time to applique ...


My applique skills are improving, I think.

I admit I still feel all thumbs.

This block took all day yesterday and it was after midnight before I gave up and went to bed
 and then all morning today just to finish up the butterfly and the smallest pieces on toady's eye.

I got another day behind in my 365 Block Challenge.


I am very happy with my cheery 


Thanks, Amy!

It may only be free for another week though, so get it now.

Next week we will have two more free blocks to add to our garden from:

Carol – Just Let Me Quilt
Ready and waiting and looking forward to the March blocks!

Must go play 365 catch-up ... Happy Quilting!

Linking up with the lovely quilty inspiration 

@ 


Fresh Poppy Design

Monday, February 1, 2016

365 Challenge ~ Feb 1st ~ Block 32


Hovering Hawks Quilt Block

3" Finished

My block is looking more like tropical birds
than hovering hawks. 

I have been thinking that these small blocks has been like making small units for larger blocks ...


... but now the units are having sub-units.

It is like babies having babies and the babies are preemies!


These are getting really, really complicated for me.

I am visually impaired and I do a lot of seam matching by touch.

I do not usually use pins or other methods of matching corners.

I tried pinning the last seam and then I had to use my seam ripper.

That last seam required three corner matches involving HSTs,
which can be tricky for me as the extra layers of fabric making feeling the match more difficult.

It came out much better without the pins. 

I am very happy with this block ... :)


Thursday, January 21, 2016

Snowman in the Cabin Window ~ Block 3


Here is Block # 3 

These are 10.5" unfinished blocks.


For this snowman I drew a hat template.

Since the center snowman square finishes at 4" in the block, it is important
to keep these dimensions in mind when cutting the applique pieces.


I cut a strip of the end of one of my 6" white applique circles
to cover the bottom third of my 4.5" black center square.


 Then I cut and laid out my strips on my machine table.

I sewed in rounds starting at the top and moving clockwise around the black square.


A word about 1/4 inch seams:
It is very important to check your seam size to be sure your blocks will measure to size.
I have to make a small needle adjustment to the left on my Janome 
to get an accurate 1/4 inch seam.

If your block measures too small or too large, check your seam widths. 


I check each block with my quilter's square to be sure it measures 10.5" 

If you missed any of the blocks in this series:


For Block 4, I will be using a different cutting method for log cabin blocks.

Block # 4 coming soon!

Is anyone sewing along with me?

I would love to see your  snowman blocks!

:) 


Friday, July 11, 2014

Easy Lattice Quilt Block


"Easy Lattice" Quilt Block

To "test"

My Easy Lattice Quilt Method

 for making my


I sewed a simple nine patch block with my extra charm squares.

My squares are 4.5" 
so I cut 1.25 strips of white 
to make my block.

If my charms were 5" square I would likely cut my strips at 1.5"


I sewed the strips directly onto the nine patch block
without cutting the block.

I used the seam edge to keep my strips straight.

If you wanted a wonky effect, you could just use the same method without aligning to a straight edge.

I did not cut the strips to size lengthwise.
I just made sure they were longer than my block side.
I trimmed to size afterward.


Then I aligned my 1/4 inch mark on my ruler on my seam line ...


.. then I cut on the outside strip of block away ...


... on both sides.


 I sewed the strips to the outside edge of the white strip,
right sides together.


 I pressed my strip seams open.


 I turned the end pieces to create a new effect.


Then I sewed a second set of strips at a ninety degree angle to the first, again lining up my strips with the nine patch block seam.


Again, I aligned my ruler on the outside edge of my 1/4" seam
 and cut away the long sides.


I played with the long side strips and "auditioned"


... before I decided on this one.


I sewed the long strip sides to the white sashing strips
making sure my white strips matched lines at the cross.


Then I pressed and trimmed my block square.

The method is sew easy!

It was too much fun not to share today.


This is a "test" block for my new charm quilt.

I am using this same method of sewing the strips onto the quilt top
and then cutting and resewing.

This is sew fun!

There are so many possibilities with this method!

I have ideas for easy plaid blocks, interwoven and knot blocks and more using this method. 

My quilty muse is having a lot of fun and running with ideas for this one faster than I can sew.


This test block will be turned into a pillow cover.

I am already planning to make a quilt
using this method with
with Kona solids.

Pictures of my new baby quilt top coming soon!

:-)


Tuesday, January 7, 2014

January Charity Blocks


These are Q&N Snug Society Charity Blocks for January.
I have been making blocks for these group quilts for several years.
are my favorite part of the 
where new members are always welcome.
I love making quilts with my quilty friends!

Sewing blocks for a group quilt is a bit different than sewing for my personal quilts.

The pattern has to be easy enough for quilters of all skill levels 
so that everyone who wants to volunteer may join in.

These blocks are from a free online pattern: 

When sewing the blocks, I always try to follow the instructions exactly as written 
so that my blocks will play nicely with all the other blocks ...
and making piecing the top as easy as possible for the lovely volunteer 
who is putting this quilt together for us.


I am making these blocks from my scrap stash. 
I carefully cut and lay out my block pieces.


I make sure I iron as instructed by the pattern so that hopefully
 the seams will nest nicely with the other blocks. 


To keep the pieces for each block organized, I do not cut the threads attaching my chain pieced and pressed units until I sew the block together.


I carefully measure and trim my block to make sure it is to correct size.

Making these blocks is fun, relaxing, uses up my stash of scraps, puts them to good use and it makes very pretty quilts!

This charity quilt project is being pieced and run by my friend,


Thanks, Sharon!

{{{{{{{hugs}}}}}}}

Linking up today with all the wonderful works in progress at

Design Wall Monday @ Patchwork Times

Some great eye candy in the links!

<3