
This is a detailed tutorial of how I sewed the
Two Fabric Flanged Machine Binding
to my
Ruffle Flowers Table Runner Quilt
I saw this type of binding online and
those bindings looked too small and thin for me,
so I developed my own cutting method
to make a full, standout binding.
I have had many requests from readers for a tutorial of this binding method
Sew here it is ...

Audition and choose your binding fabrics.
I used to have a difficult time choosing just one,
so using two fabrics is a win-win for me!

I run a line of stitches around the edge of the quilt during the quilting process and use this as a guide line for aligning the cut edge of my binding on the back of the quilt.

Cut 1 and 1/2" strips of the main binding fabric fabric,
and
2" strips of the accent (flange) fabric.

Sew the strips together end to end.

Trim the selvedge and press open.
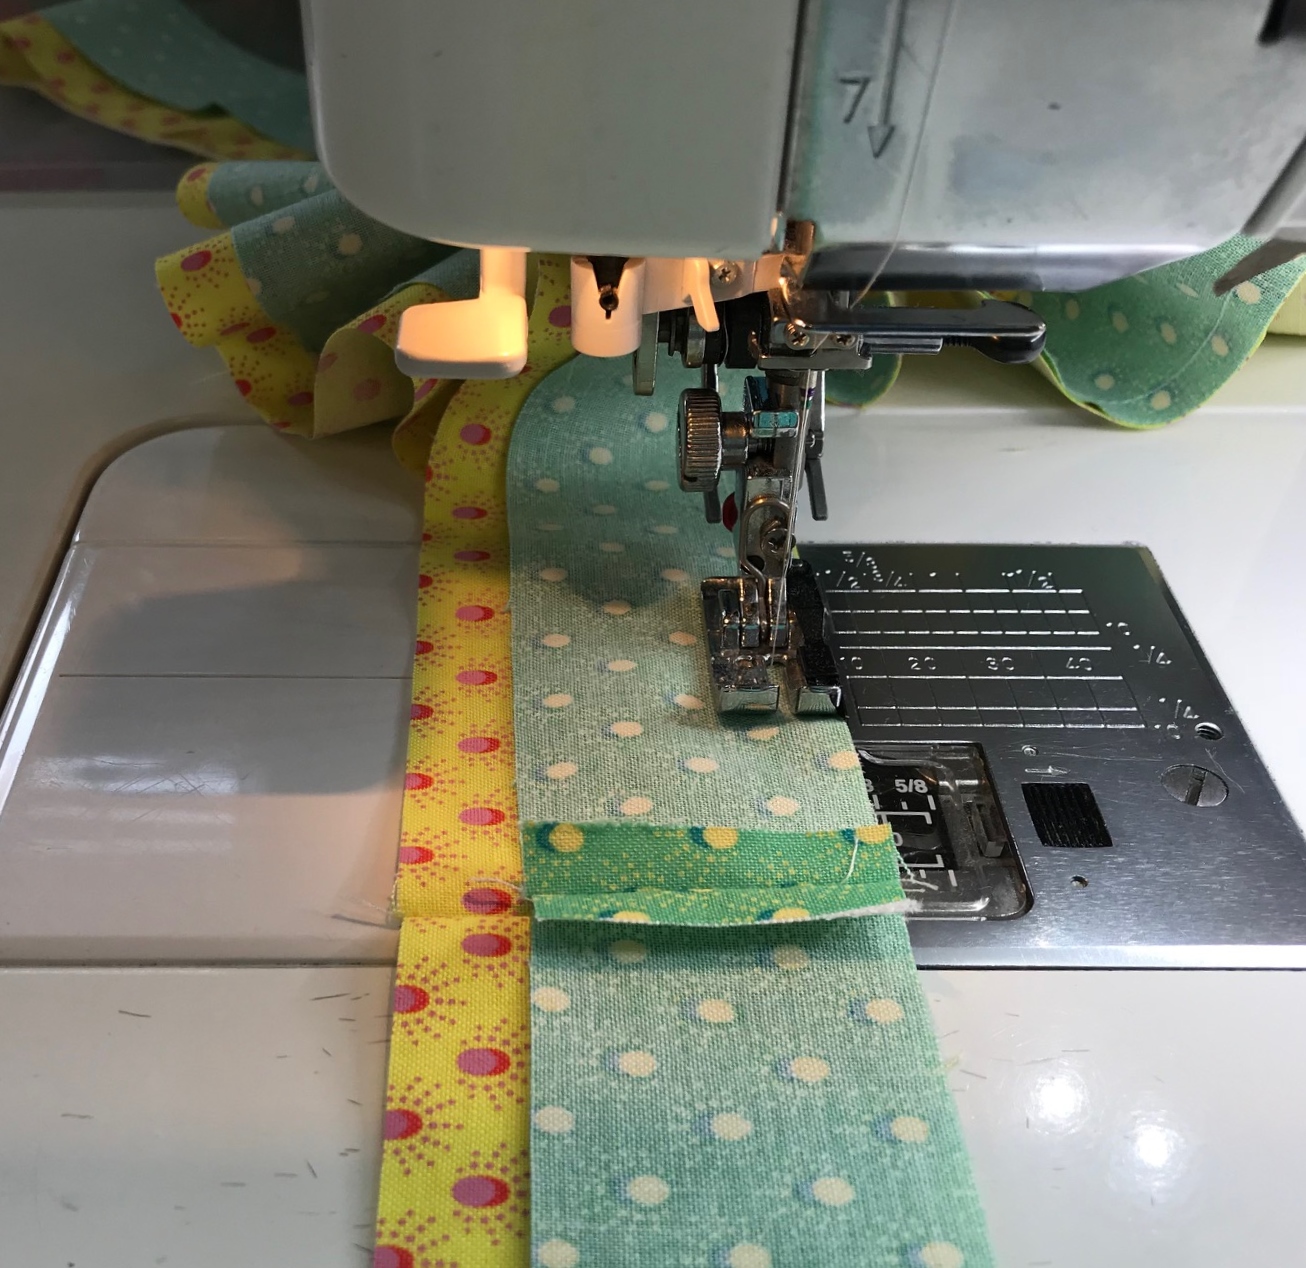
Sew together lengthwise.

Press to the main fabric.

Press in half making a sharp edge on the flange.

I like to use a large Binding Baby to hold me prepared binding.

This cutie sits very nicely on the second thread spindle on my machine.
As you can see I match my binding thread color to the flange color.
My bobbin color is the one I used for quilting the back of the quilt.

Machine stitch to the back of the quilt 1/2 inch from the edge of the quilt,
leaving a ten inch tail at the beginning.
I place the cut edge of the binding on the guide line of stitches
that I run around the very edge of the quilt during the quilting stage.
You can see that line of stitches ...

visible here, as I stop to turn the corner.
I backstitch off at an angle to the corner.

The I fold my corner at a right angle and put a clip where
I want to start sewing on the next side.

I remove the clip, needle down and up and pull up the bobbin thread,
take two stitches and backstitch two stitches
so my corner is closed and secure.

To finish my binding, I stop my stitches leaving about a ten inch opening.
Then I fold the fabrics to meet in the middle of the opening
and finger press.

I mark the place where I want to start stitching with an erasable fabric marker.

I cut both ends about an extra inch long.

I open the binding and with right sides together,
I match the flange edge carefully an pin
I mark a line with the erasable fabric marker
and sew along the line.

I hand press open the closing seam, trim to a quarter inch seam
and turn it right side out sand flatten it.

Then I sew the opening closed.

Then I fold the binding to the front, tucking in the batting edge,
and use binding clips to secure around the edges.
The flange will just cover the line of stitches that secure the binding to the back.

Here is the corner fold.

Here is what the clipped binding looks like front and back.

To stitch the binding to the front of my quilt I use my zipper foot.
This little foot fits snugly into the narrow flange.

To turn the corner, I open the binding and stitch right up to the line
that attaches the binding to the back.


I resume stitching at the corner and continue all around with the help of the paw.

This is a close up of the binding on the front.

Close up of the back.
You can see the line of stitches that secures the binding to the front
just inside the turn.
I hope you enjoyed this tutorial.
If you use this method, I would love to receive feedback to
scrapatches@gmail.com
Here are some of the other recent flanged bindings I have sewn.

There are also how to photos for the scrappy binding on my
Fat Quarter Cubes Pillow
which has a gray ombre flange.

For more examples,
I have also added this binding to these quilts:

This striped and silver grey binding is on my


This two color also appears on my

Every time I use this method,
I love it more and more.
It is now my favorite go-to method of binding.
May you enjoy it, too.
I have entered this tutorial in the

Voting open June 16-20th.
Tips and Tutorials Festival Link Up
I have entered this tutorial in the
Voting open June 16-20th.
Tips and Tutorials Festival Link Up
Lots of interesting and inspiring new tutorials and tips in the links!
Thanks for visiting me today!


