Showing posts with label hexagon quilt block. Show all posts

Friday, August 23, 2013

Zig Zag Hexed Twice!

 
Zig Zag Hex!
Side One 
My Original Pattern
Quilt Size: 60" by 65"
 
 Zig Zag Hexed Again!
Side Two
 
This is my first "Thoroughly Modern Quilty."
I am feeling pretty chuffed as these actually worked up
to look just like the images in the quilty place in my head.
My inner Quilty Muse is pleased.
 
 
This is where it started,
with a sketch, a stack of possible fabrics and two rulers ...
my 6.5" x 24" standard ruler and a large 60 degree angle ruler,
both from Creative Grids ...
and with the help of my inner Quilty Muse.
 
Thanks to all who tried to help me decide whether I should
"Orange or Not"
Here
As you can see, in the end the orange jumped in for the pieced back.
It does make a bold statement and I am happy that I went
with the lower volume palette on the front.
I do also like the orange zing on the back.
My hubby liked the back and thinks this should be called the front.
 
I think I shall just call it a "Two Sided Quilt."
 
The easy hexagons were pieced from 2.5" strips.
 

I made two identical 2.5" strip sets with three strips each and used my 60 degree angle ruler to cut the triangles to form the hexagons.
 
 
I made three blocks from these strip sets,
on "in" and one "out"
 
 
and one with the extra triangles.
   
 
I pressed one strip set in and the other strip set out and nested the seams as I sewed the triangles together to form the hexes.
 
 
I sewed in halves and then sewed the halves together.
 
 
I placed the hexagons up on my design wall
where I wanted them to be in my quilt.
 

Then I added the strips for the zig zag.
The zig zag was also pieced with 2.5" strips.
These strips measure 6.5" unfinished.
 
Figuring how to piece the setting with no "y" seams took a little time,
but I was able to sew everything into rows and then sew
the rows together as for an on-point setting.
 
 
My quilty kitties, Katniss and Butterfly were also very helpful.
 
 
So was my grand-kitty, Pepper, who stayed with us
while The Happy Couple were honeymooning.
 
Once I worked this out, the top went together easily ...
around frequent stops to visit a couple of doctors and
to go get my eyes "mapped" and other pre-op preparations ...
and to just rest my eyes now and again.
 
I really like this pattern and hope to be taking
what I have learned in the design process, making a few small changes
and adjustments to make the construction easier,
and that I will be making it again soon in solids.
 
I have some very labor intensive quilting in the works
and it will take me sometime to post the finished quilt.
I am looking forward to taking my time quilting this one.
 
>>> "just keep sewing" <<<
 
I hope you have enjoyed my hexie happening
for this hex of a blog hop!
 

Please visit all my Hexie Queen For the Day friends!

Friday, August 23

Sew Peace to Peace
Life in the Scrapatch ( you are here! )
 
Thanks to

Madame Samm @ Sew We Quilt

and

Debby @ Debby Kratovil Quilts


This blog hop is "sew hexilerating" !

I want to make one of everything I see!

... just keep sewing ... just keep sewing ...

 
... and hexing!

~ <3 ~


Thursday, August 15, 2013

Sneak Peek at my Hexies Happenings!

Hexie happenings!
 
I am very pleased with how this pattern idea is working up.
 
At this point I am 99.9% certain that there will be no orange in this quilt.
Thanks to all who offered their thoughts on the orange question here.
 
I am really looking forward to the
 

Hexie Blog Hop!
 
More soon .... ;)
 
... just keep sewing ...
 
:-)
 

Wednesday, July 17, 2013

Quilty Christmas in July


A Merry Hexie Quilty in July!

My quilty corner has been enveloped in the longest, hottest heat wave of the summer.  While I have been staying inside in the breeze of the AC and quilting the table quilts for My Girl and Her Groom, I have been enjoying my breaks by cooling off with all the Christmas in July quiltiness in blogland.

While I am quilting I am dreaming of a Quilty Christmas.

Visions of my project for the ...
 
are dancing in my head!

I am posting on August 9th!

To get into the spirit I took a picture of the
 
 
 Hexie Quilty Trivet that I made last year.
 
It was made as a quilt test project from a sample block I made for the
 
 
Tumbling Christmas Blocks Quilt


featured in my Quilty Christmas Open House post.
Tutorials for the "no y seams" easy piecing of this traditional pattern
may be found in My Tutorials.
 
Here is a pictorial of how I made the Hexie Trivet:
 
 
2 diamonds and 2 triangles to make this block
The triangles are sewn to the top of the diamonds and then
the seams are nested and the two units are sewn together
to make the third diamond.
Sewn into strips, these make tumbling blocks with no "y" seams.
 
 
quilted onto batting and backing

 
 QAYG borders added

 
more quilting


trimmed to hexagon shape
 
 
ready to finish
 
 
flannel backing and binding.
 
 
I used this last on my holiday table.
I am planning to make more quilty trivets this year.
 
Have you been following these cool and Christmasy blog hops?
 
 
Christmas in July Blog Hop @ The Crafty Quilter

or
 
my personal favorite blog hop for this month ...


from one of my LQS, Quilter's Way
 
Lots of great ideas and tutorials to get you in the
Christmas in July spirit!
 
Enjoy!
 
Happy Christmas in July!

:o)
 

Saturday, July 6, 2013

A Hex of a Blog Hop is Coming!

 
I <3 Hexagons!


Sign-ups coming soon for this new blog hop at
 
Sew We Quilt
 
Hope to be in the hop!
 
Hope to see you joining in the fun, too!
 
~ <3 ~


Thursday, May 9, 2013

Boston Hub Block ~ Tutorial and Tips


Boston Hub Block
 
an original block design
Unfinished Block Measures 12.5" by 16.5"
Tutorial and Tips for machine sewing pieced hexagons
 
This is the first of my blocks to be sent to

Quilts for Boston
 
 
is collecting blocks to be sewn into quilts of comfort for these families.
 
Please click on the link or image for more information.

My "Post-It Note Pattern" sketch
 
This is the idea and here is how I made the block
with tips for sewing pieced hexagon shapes.
 

The colors for these blocks are blue, yellow, white and gray and the size calls for the blocks to measure 12.5 inches high by "width of choice."  I decided that if I started with a 6.5" hexagon center and added 2.5" strips to the sides, I could add a border that would make it 12.5" high. I was not sure how wide this block would measure but I estimated it to be between 16-18 inches. 

I knew I wanted a blue hexagon center
 
Since I wanted to machine piece and avoid "Y" seams, I knew I would have to piece the center hexagon.
 
 
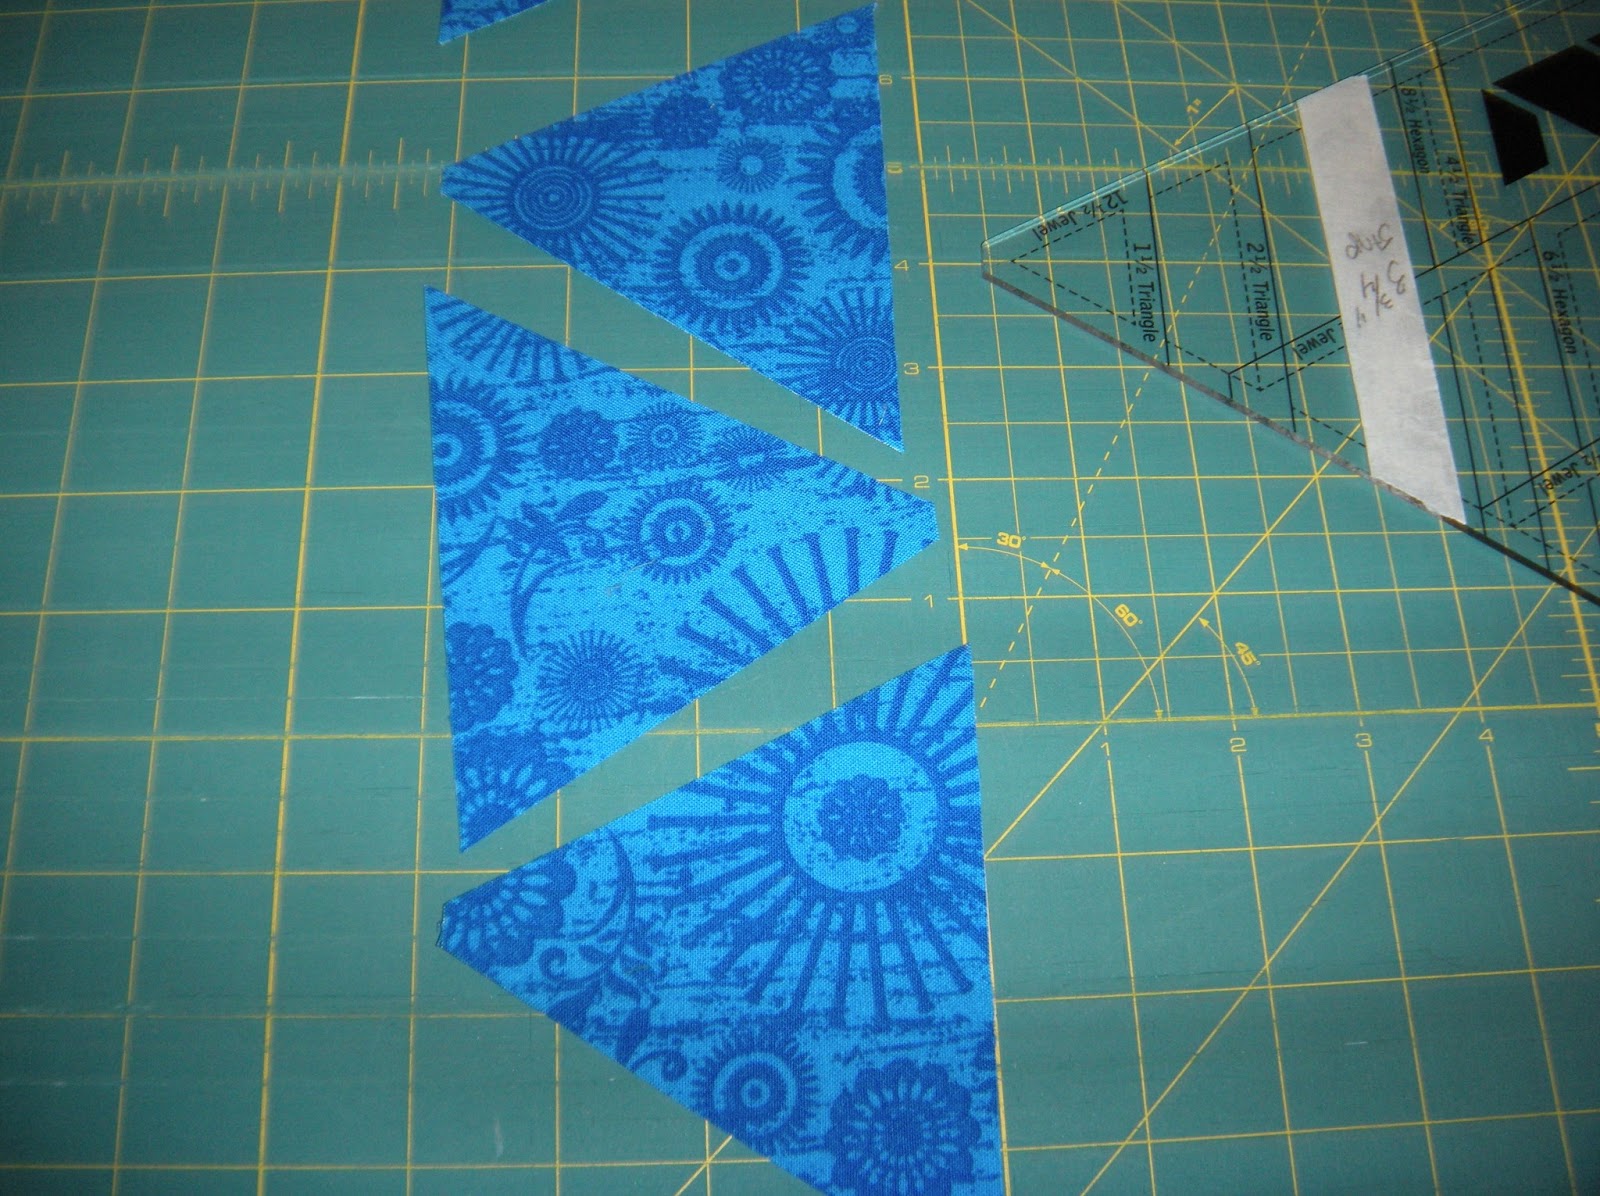
I used one of my favorite new quilting rulers, the
 
I determined that my triangles for the center would have to be cut from a 3.75 inch strip for the seam allowance. I temporarily marked my Hex n More ruler with a piece of removable tape.
 
I cut a 3.75" strip
 
and cut six 3.75 inch  triangles
 
then I cut six 6.5: half hexes from a 2.5 inch yellow scrap strip
 
the pieces to the puzzle
 
I laid out the triangles and half-hexes and decided on a solid white
for the "spokes" of the hub and the block corners.
 
 I cut the half hexes in half to add the white spokes.
 
The white center strip for the spokes is 1.5" by 2.5"
 
sewing the center spokes
 
At this point I realize that my half-hexes were now too large
because of the center strip, so I cut 1/4 inch off each side.
 
 
I added a 1.5" strip of white to each side of the half-hex
and I trimmed the extra.
 
finger press the blue triangles and half-hex strips in half
to find the center.
 
pin center and sew
  
At this point I decided to add a 1.5" strip of blue to the triangle unit.
 
the new pieces to the puzzle
 
I pressed each of the triangle units in opposite directions so that
I could "nest" the seams to get a more accurate seam.
 
 I used the Hex n More ruler to trim the units.
 
nest seams, pin
 
sew nested seams, removing pins as you sew
 
the first two triangle units sewn together.
 
At this point Katniss decided to check my work while
I sewed the rest of the triangle units.
 
This shows the back of the units, sewn, trimmed and pressed for nesting the seams together.
 
Sew into half hex units and press to nest seams.
 
Hexagon unit completed showing that the center is a 6.5" hexagon.
 
placing the block for checking "squareness"
The bottom edge of the block is on the zero line of my mat.
 
I used the lines on my cutting mat to make sure the hexagon was "square"
 
 The ruler is along the dotted 60 degree line on my mat


I used this ruler to determine the size and shape of the corner triangles needed to make the block rectangular.

 Then I cut the white corner triangles oversized
and sewed on opposite sides.
 
 My unfinished block measures 12.5" by 16.5"

 
I am calling this the "Boston Hub Block."
Boston's nickname is the "The Hub."
The logo of the Boston Bruins hockey team is a hub

I made this block is in memory of Martin,
who was a Boston Bruins fan.
 
I hope you have found this tutorial and the tips for how I sew pieced hexagon units helpful.  If you have nay questions, please contact me. My email address may be found in my header bar under "Contact Me".
 
Please feel free to make this block or your own variation of it.
 
If you do make this block and use my tutorial, please link back to my blog.
 
Enjoy!
 
:)