I have been getting to know my borrowed Janome Jem Platinum and have been been playing with my scraps. I love scraps! The smallest I usually use are 1-inch squares. One inch strips are fun to work with to make tiny key chains and other tiny quilty treasures. I have used 3/4-inch pieces in the past, too, but they sometimes "seam" a bit too small for my eyes these days.
Here are some I have made in the past.
After taking home my tiny quilts show treasure I studied it awhile and then figured out how to make some of these tiny treasures for myself. They also make nifty giftys. :)
Here is how to make a Tiny Log Cabin Key Chain
Start with 1-inch ( or 3/4") squares and strips from your scraps.
Cut them carefully to size.
Pick a 1 inch square and a 1" by 2" strip to start or sew two 1" strips together and then cut into 1'inch strips. I like to "assembly" line these and make a small batch of tiny log cabin blocks at a time.
Press seams open.
Continue to add strips and press seams open and square blocks as you go. I put pink strips gradating light to darker on two sides and greens on the other ending with a my darkest green strip.
To sew, make in rounds as you would any Log Cabin Block.
Continue around
Pressing, trimming and squaring to size is very important.
I also check carefully to make sure these blocks are squared as a go around.
Here is a completed 3-inch log cabin block.
Back ... with seams pressed open ...
and front ...
I find pressing is very important when making these. Sometimes I just use my seam roller by my machine. I also have found I like to press the seams open as I go. I always give them a good pressing with my iron before finishing. Best Press or another starch alternative is a good addition when pressing these.
Now it is time to pick a block and make the key chain. :)
Make a handle for your key chain, by pressing a 1" x 4" strip of fabric into a bias tape strip ...
then fold in half and press again ...
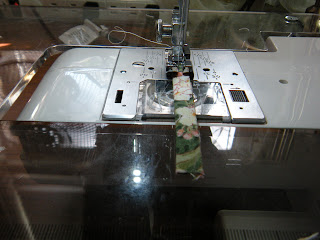
Topstitch the handle strip closed ...

Time to assemble to key chain. :)
Attach the handle strip to the backing of your key chain. Place the backing right side up and use one pin to attach the handle with the raw edges out to one corner of the square.
Layer the top block to the backing right sides together. Make sure the handle is in the middle with just the raw edge sticking out into the seam line.
Add a layer of batting that has been carefully cut to size.
Please notice that I have trimmed three sides of the backing and left a longer opening on the side that I will leave open to turn the key chain right side out. I trim the backing to a 3" square with no longer side. This is important because you will be turning the square over and stitching the sides on the backing.
Start in the corner diagonally across from the one where the handle is pinned. I start on the open side and put a few stitches and then turn the corner onto the next side. Continue stitching around and remember to remove the pin where the handle is just before you stitch that corner.
Stitch the third side and turn the corner onto the side you will leave open and stop, leaving at least a 1-inch opening.
Turn your key chain right side out. The handle become an easy tool to help pull this right side out. Use a dull pointer of some type to push the corners out square. I like to use a bone tool used in scrap booking and journal making to press paper folds flat.
Fold the seam allowance in on the open side. Press.
Hand stitch the opening closed using a blind stitch. This is the hardest part for me these days because on my poor eyesight. If you preferred, you could machine top stitch around the edges to close the opening and add a machined top stitch around the edge.
Attach a metal key chain ring and you are done!
Needle keeper idea.
Here is my completed Log Cabin Key Chain. The Log Cabin Block measures about 2.5" square. I used to be able to make these smaller when my eyesight was better. I have not made these in awhile. It is nice to find I still can. :)
Have a happy quilty day!
:-) Pat


.JPG)


6 comments:
It's adorable..would love some mail!
Beautiful. I like making quilts or anything small project from fabric scraps. Now back to look at the past quilt shows that was in Lexington.
Trina
>>> and the winner of the Log Cabin Keycahin is ... :::drum roll::: ... Quilt Hollow! I do not have your address. I have my blogging email address on my blog profile, so if you would like to send me your snail mail, I will drop your little squishie in the mail to you ... :) Pat
Trina ... not to be sad ... I have other little quilty keychains ... and I have your address ... :) There are always some wonderful quilts in the Lexington Show. This show is very well run and it is one of my favorite fall quilt shows ... <3 Pat
This is so cute, I may have to make a few, or at least one. It would be cute even if it were just a 4 patch, or 9 patch. Thanks for sharing.
Very cute, super idea for gifts.
Som cute!
Post a Comment