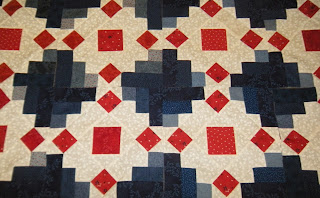
November is my pick for the Stitchin' Sisters Swap group at The Quilt and Needle and I chose The Old Red and Blue Block from The Quilter's Cache in scrappy medium reds, denin to medium to navy blues and white tone-on-tone. I really like these blocks and the secondary pattern that appears when you place them next to each other. I hope my Stitchin' Sisters will like it, too.
I printed the block instructions and made a sample block as written but my block came out a little small, so I designed my own plan to make these blocks so that they come out a perfect 12.5" unfinished squares. You may find the instructions as written work fine for you. Sometimes I just have to find my own way of doing things.
Since a couple of my Stitchin' Sisters have asked for a tutorial, here is how I made these blocks ...
Cutting:
Red ... one 3.5" square and four 2.5" squares per block
Blue ... four 2" x 5" rectangles, four 2" by 3.5" rectangles and four 2" squares per block
White ... one 4.5" square, sixteen 2" squares and one 2.5" WOF strip per block
Cut the white 4.5 inch square on the diagonal twice to make 4 triangles
Sewing:
For making these units I like Bonnie Hunter's Square in a Square Tutorial on Quiltville. Bonnie cuts her triangles a bit large to give them plenty of "fudge room" to trim and square them. I like fudge ... especially chocolate fudge. ;)
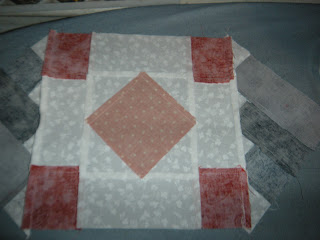
To make the square in a square centers, sew a white 4.5" triangle on opposite sides of the 3.5" square.
press toward triangles and trim dog ears
Sew on the other two opposite sides. I always like to check my seam allowance to be sure I am sewing an accurate 1/4" seam.
press toward triangles
My SIAS units when pressed, squared and trimmed measures 5 inches square. This may be larger than intended by the block designer, but it works for me if I adjust the size of the white sashing rectangles.

In my sample block, I thought the white rectangles in the original cutting instructions were the biggest problem to preventing my block from laying flat or coming out to the correct size. So I used this method to sew the frames on the square in a square centers.
I laid a 2.5" white WOF strip right side up on my sewing machine bed and laid the red SIAS units face down and sewed one after the other onto the white strip. Then I laid a second strip right side up and sewed the other side.

Then I cut the units apart carefully and pressed the seams toward the white triangles.
trim, if needed
I sewed the red 2.5" squares on either end of the 2.5" X 5" rectangles.
My quilty kitty helper made sure I was doing this right.
press toward white rectangles
Then I sewed these onto the opposite sides on my SIAS unit.
I found these 5" strip units fit and the seams nested perfectly.
Press outward toward white rectangles
I also made a change to the method of sewing the blue striped corner triangle units.
Instead of cutting the small white triangles in the original instructions, I cut 2" white squares and sewed one white square to an end of each blue rectangle.
press toward white squares
Align the blue strips so the small blue square is on the right.
chain piece strips together/press toward white squares
sew white square on side of blue square and press toward white square
press toward white squares
align ruler to allow a 1/4 inch seam and cut off the extra fabric
this will cut away 4 tiny white triangles
(which may be saved for another purpose if you make mini quilts)
Lay out the corner triangles around center unit before sewing and check the orientation of the blue strips. This will ensure that the finished blocks have the blue strips aligned in the counterclockwise rotation as shown in the block instructions.
Sew opposite sides first, as in square in a square blocks
press outward toward triangles
pin and sew last two opposite sides, removing pins as you sew
press toward triangles
finished block should measure exactly 12.5" square
with little or no trimming
these blocks are kitty inspected and approved
Six Swap Plus One Charity Blocks
Ready to send!
:-)


No comments:
Post a Comment