.JPG)
My New Ironing Station!
This is the Tutorial for the large DIY Ironing Board.
Please be sure you visit my main

With my new removeable and washable cover for my big moveable ironing board!

Here it is on my cutting table where I can easily iron a whole quilt.

Here it is in it's regular station for pressing blocks and such.
This beautiful fabric which perfectly matches the aqua and yellow paint in my sewing room is from the ...

"Handmaids" line for She Who Sews!
from Quilting Treasures
Katniss says, "I like these pretty new fabrics.
The green in the one nearest me goes well with my eyes.
You should pick that one!"
This is my favorite fabric in this line, also, so Katniss shall get her wish.
The colors in these fabrics are sew pretty!
I bought three yards of the print on the left to make the new cover for my long ironing board and smaller cuts of the other fabrics.
This photo was taken in the best of the winter light coming in my window today and it really does not do the fabrics justice.
Sew ... my first sewing room makeover project is the new cover for my
DIY Ironing Board.

This really is made of boards.
Three scrap boards I found from some home improvement project we did one time.
The boards have lips which nest them together.
I added heavy duty staples to hold them together securely.
When I moved into my sewing room, I covered it with layers of scrap batting and then wrapped it with a length of yellow flannel which is also stapled to the back.
It sits on top of some rolling storage units which stores some of my stash ...
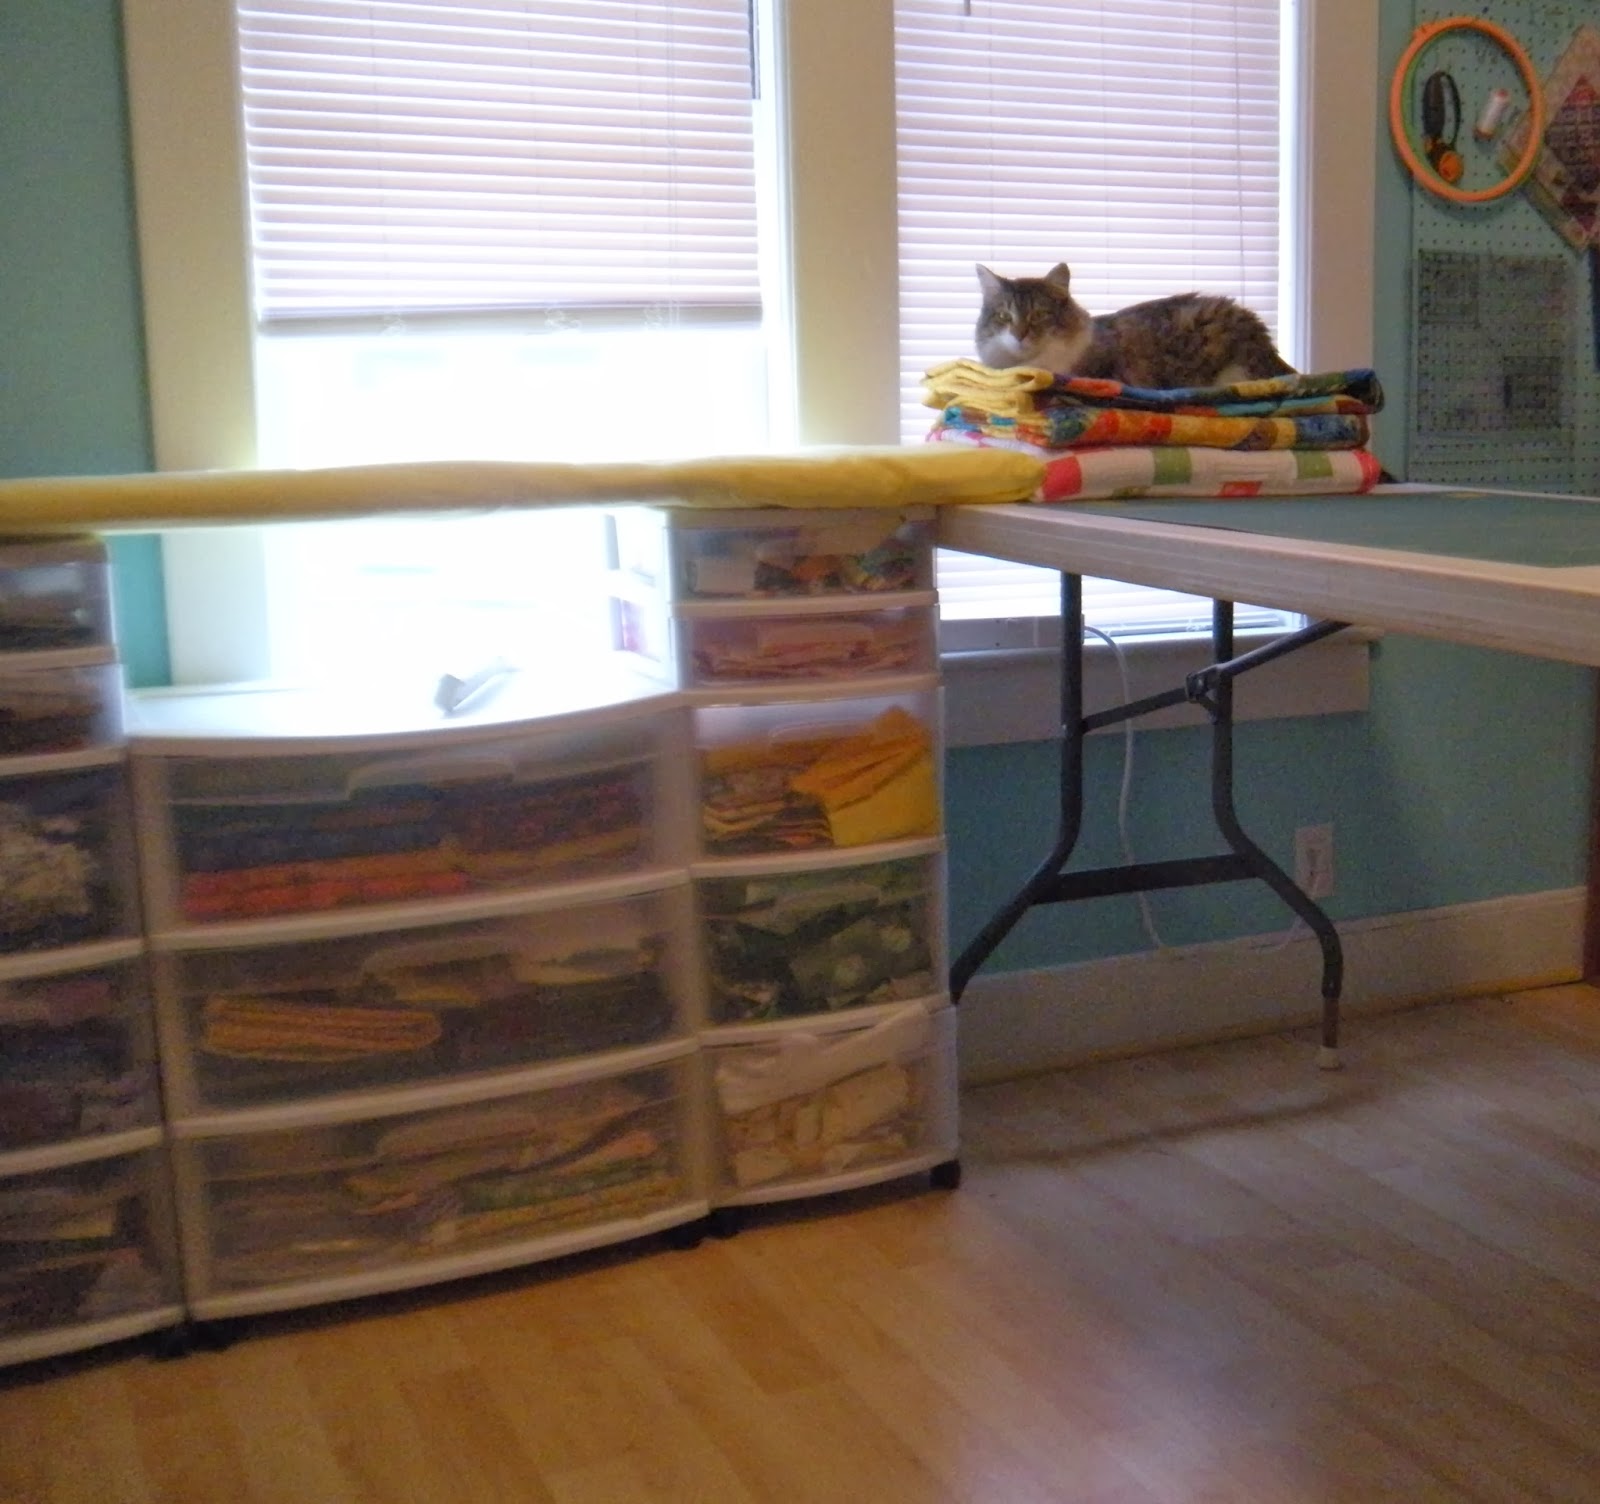
Katniss sits on top of any stack of fabric or quilts
or curls up on this ironing board to take a nap.
As it is up against the wall and windows,
I did not attach the board so it is moveable ...

... so that I can also set it on my long cutting table and press a whole top or quilt
with the long edges hanging over the open sides of the table.

It is over 60" long.
I can also easily press open a WOF quilting fabric.
The old lose cover was getting worn and I had to pull out the staples everytime I washed it so I decided a removeable cover was very much needed.
Here is how I made my new cover:


I sewed them right sides together on one edge.

Turned the edge over and sewed wrong sides together along the other edge.

This made a very durable drawstring to tie the cover in the back.

The padding on the boards was very flat so I added a stiff new layer of padding with some Insul-Bright that I had in my closet.
I used the heavy duty stapler to attach this directly to the back of the boards.

I cut my cover fabric by measuring 8.5" around the edges of the board.
Katniss helped.

I checked the size and fit by folding the edges over the back.
Butterfly supervised.

Then I cut 6.5" squares from the four corners.

Sewed rolled hems around the cut corners so they would not fray or rip.

Sewed a 1 inch pocket for the drawstring on all four sides.

Threaded the drawstring continuously through all four sides.

Drew the drawstring tight and tied.

With some extra fabric I made a new cover for my iron pad, too!

The ironing pad cover is simply a small pillowcase
to cover the pad I made some time ago.

Just hemmed, sewn of three sides ...

and tucked.


One her favorite new nappy spots is on the new ironing board cover up against the pillows. Katniss and Freddy Teddy and Auntie Antique are cuddle buddies.
I am really enjoying my new improved ironing station.
I have had a few questions about how I made the draft stopper in my ...

The length of fabric I used for my ironing board cover was 2.5 yards
of the multicolored floral.
When I cut the WOF down to size I had a long strip, 6.5" wide by 2.5 yds.
This is the strip that I used for my door draft stopper ...

I folded the long strip in half right sides together and sewed a 1/2" hem on the short sides. Then I sewed 1/4" seams on the long sides. I turned it right side out and sewed two long seams 2.5" from the sides to form the tube pockets. Then I inserted the tubes and tacked the open ends shut with a few stitches.
Thanks for visiting my new and improved scrapatch today!
Before you go ...
If you have not entered my

Grow Your Blog Hop Mug Rug Giveaway
There is still time to do so.
Click on the above link for details!
The winner will be announced on February 15th!

For now, Freddy Bear says
"I like this new ironing board cover in my comfy corner.
Time for a rest with these pretty pillows.
Bye for now!
~ <3 ~
If you have not entered my
Grow Your Blog Hop Mug Rug Giveaway
There is still time to do so.
Click on the above link for details!
The winner will be announced on February 15th!
For now, Freddy Bear says
"I like this new ironing board cover in my comfy corner.
Time for a rest with these pretty pillows.
Bye for now!
~ <3 ~
5 comments:
I need to make one of these big ironing boards.
This is a great tutorial, the fabric is beautiful, love it! thank you
Peg x
Great tutorial on your cover Pat!I love how you made your ironing board.
Gosh, Pat, you have been busy! Love all your new sewing room accessories ... very swish indeed :)
You are so lucky to have room for such a board. Mine would have to be outside. But I may have to make one half as long. I truly hate using a regular ironing board. Don't all of you too? The thing just isn't suitable for quilting, me thinks. LOL
Post a Comment