Showing posts with label Quick Curve Ruler. Show all posts

Monday, August 18, 2014

Spider Web Quilt-Along ~ Cutting Curves with a Quick Curve Ruler


Feeling a bit of fall in the air today!

No, the leaves are not changing here yet.

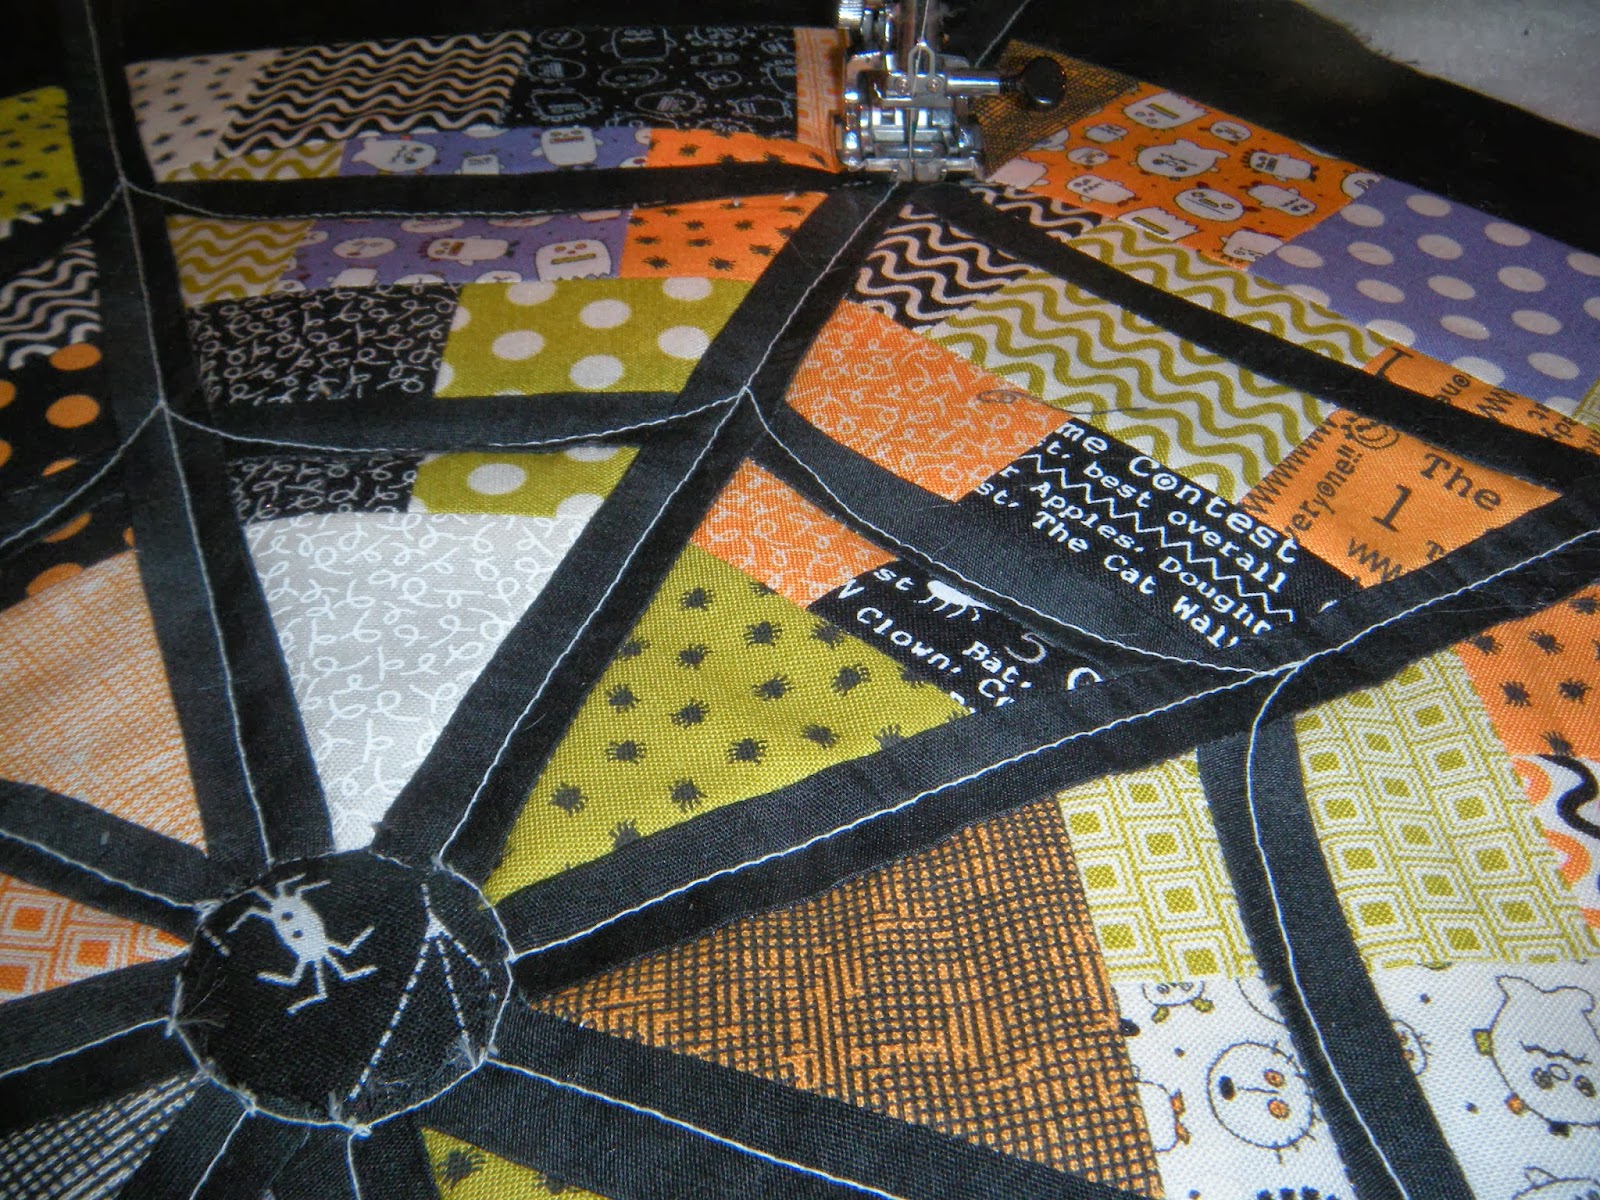
This photo was taken last fall.

I am just getting ready for sewing for Fall 2014.

I had this post ready to post in September, but I just read this ...

3 Day Sale on the QCR @ Sew Kind of Wonderful

Join our Blog Hop

to kick off her fun blog hop.

There is a cute  Free "Cupcakes" Patter Tutorial Here

I will be hopping along for this one to gather more ideas for using my QCR.

There is also

QCR Giveaway Today @ Quokka Quilts

Hop on over for a chance to win the ruler and a pattern!

Enjoy the hop!

This is the ruler I use for cutting the curves in my 


Spider Web Quilt-Along 2014

 ~ Cutting The Curves ~

I bought my Quick Curve Ruler

from 


who created this ruler and has developed a great line of
to make using this wonderful tool.

I love this ruler and find it very versatile.


I have used it to cut round corners on a custom table cloth 
for my son's odd shaped table.


I have made my son a runner from the free pattern that came with the ruler.


I have made most of the Curve it Up Quilt-Along blocks
... and need to get these blocks sewn into a quilt top. 


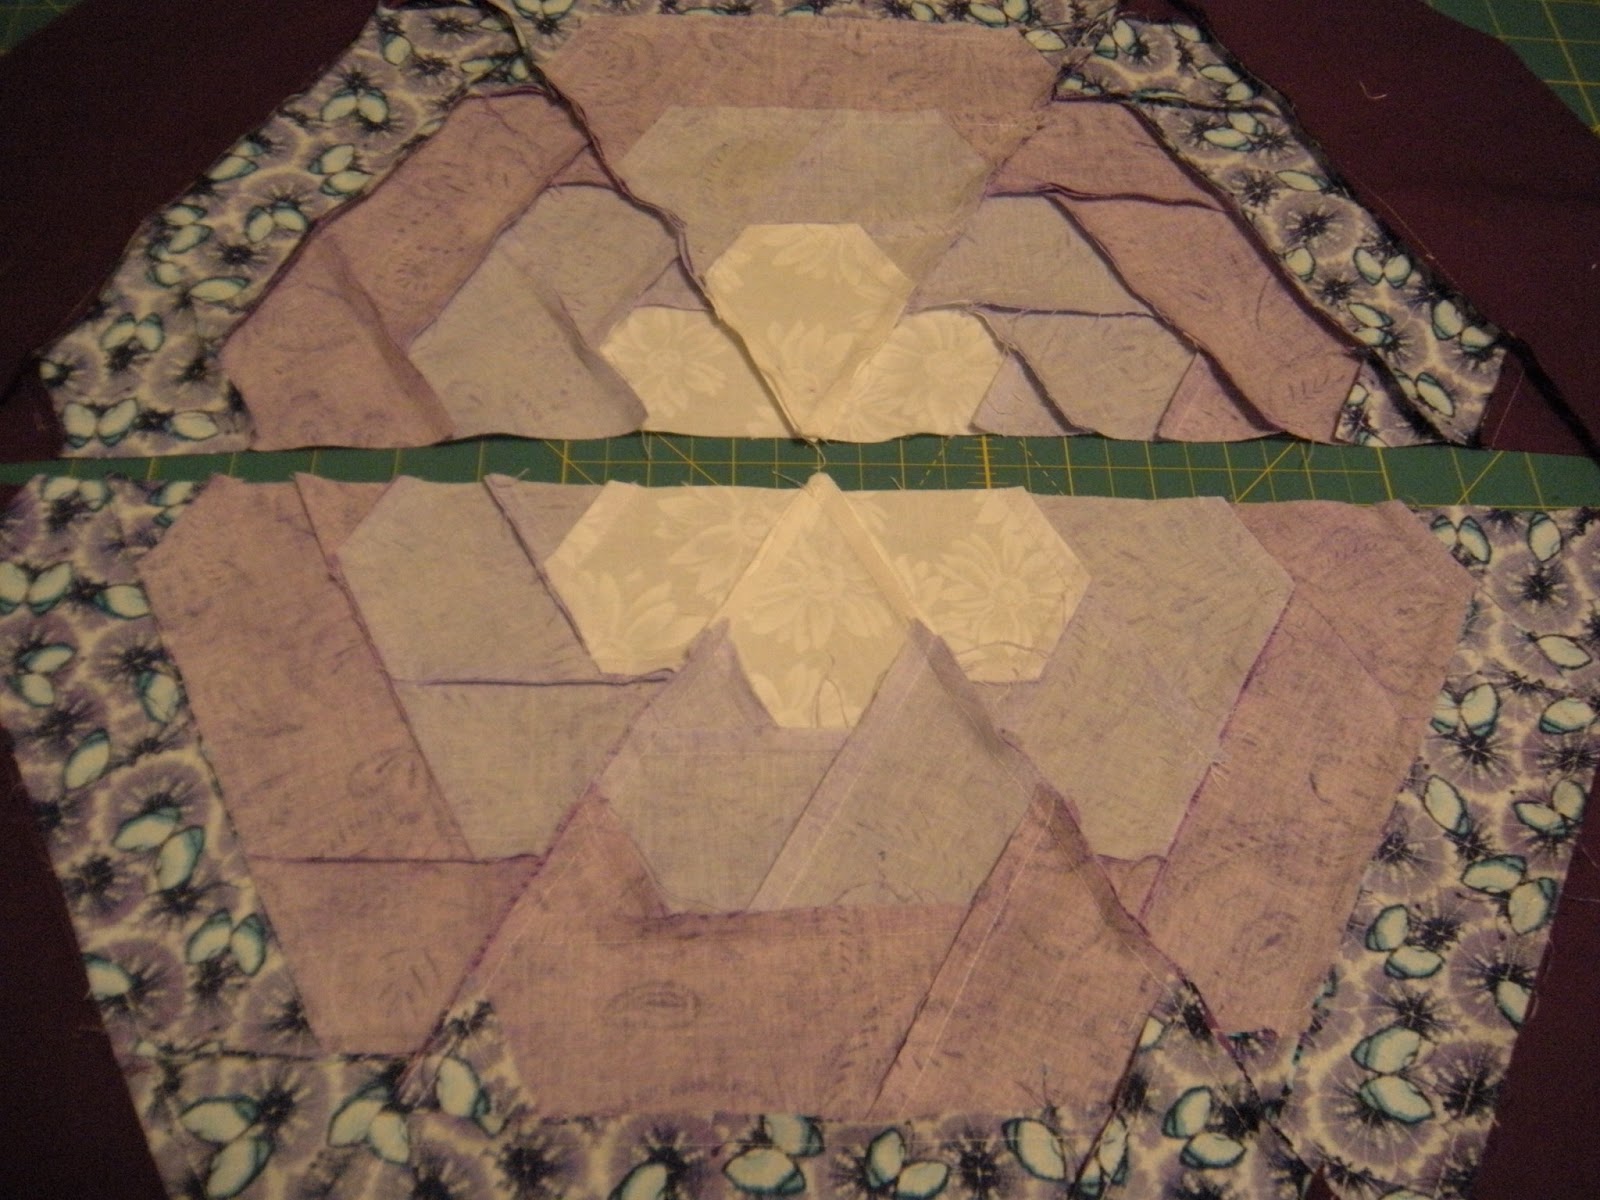
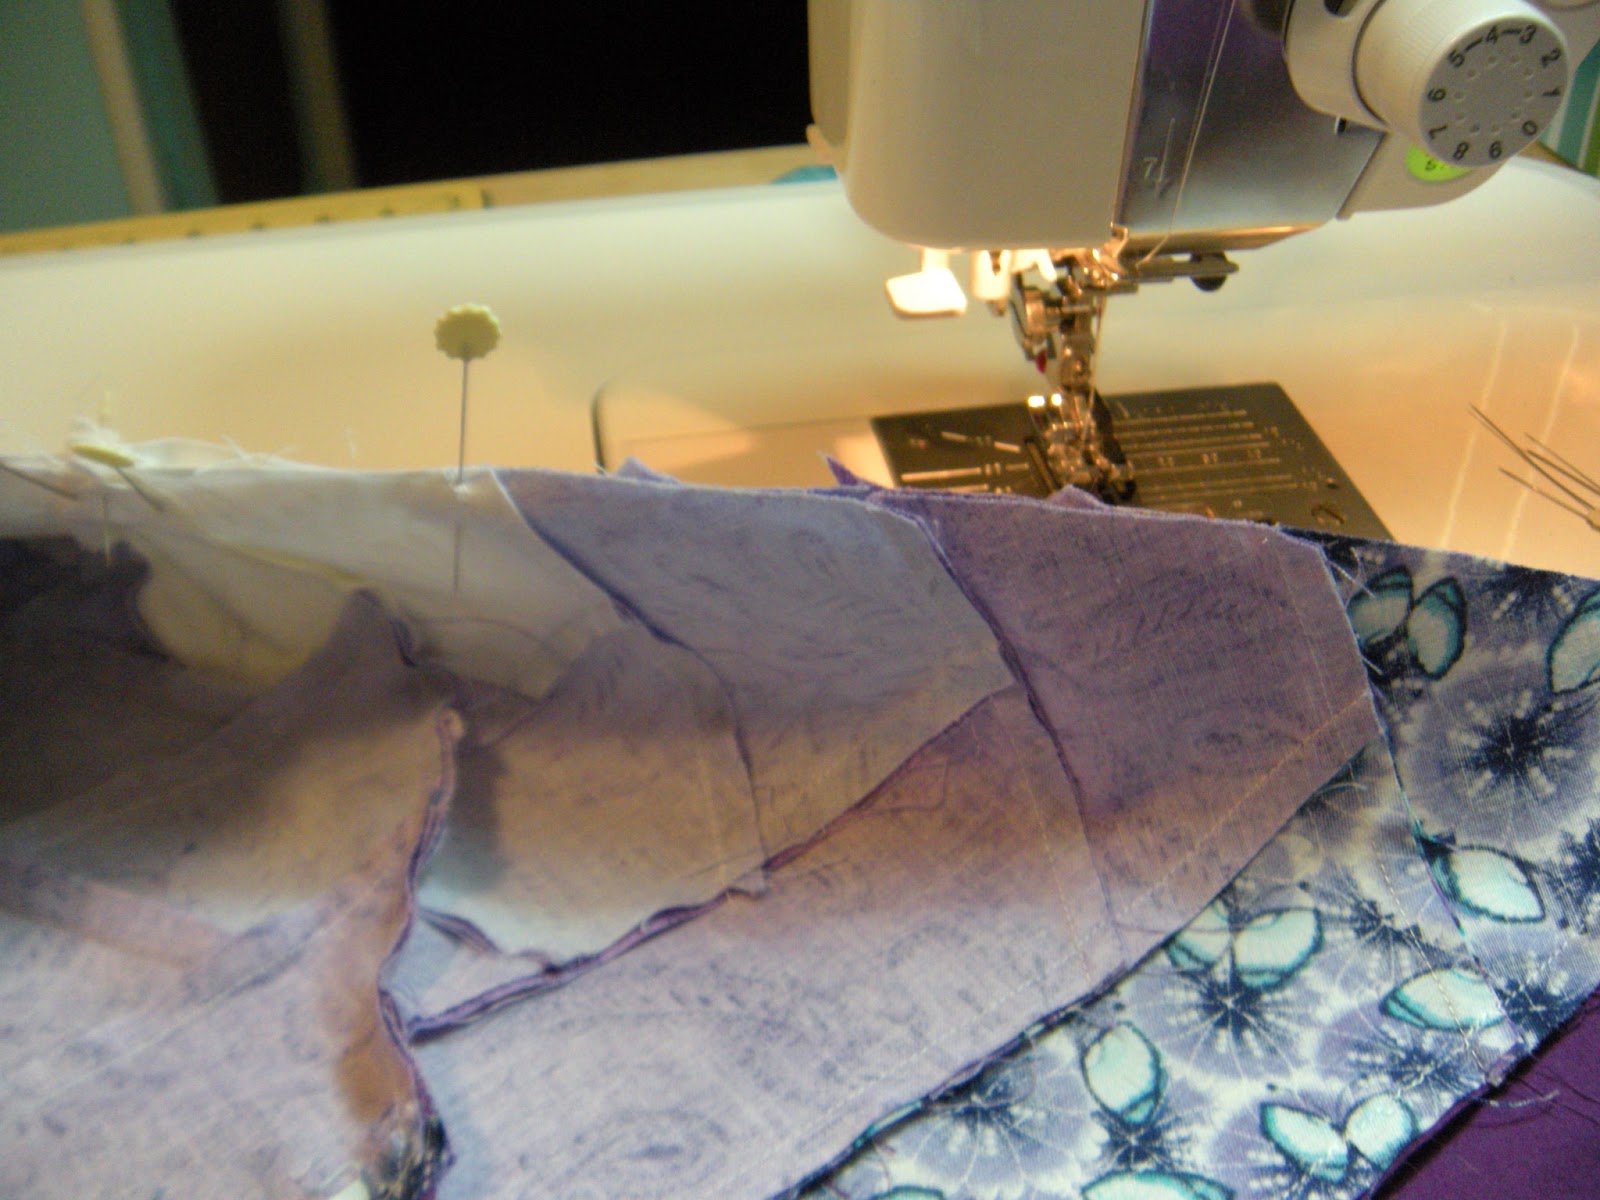
I used this ruler to make the scalloped petal shaped 
table quilts for my daughter's wedding reception tables last year.


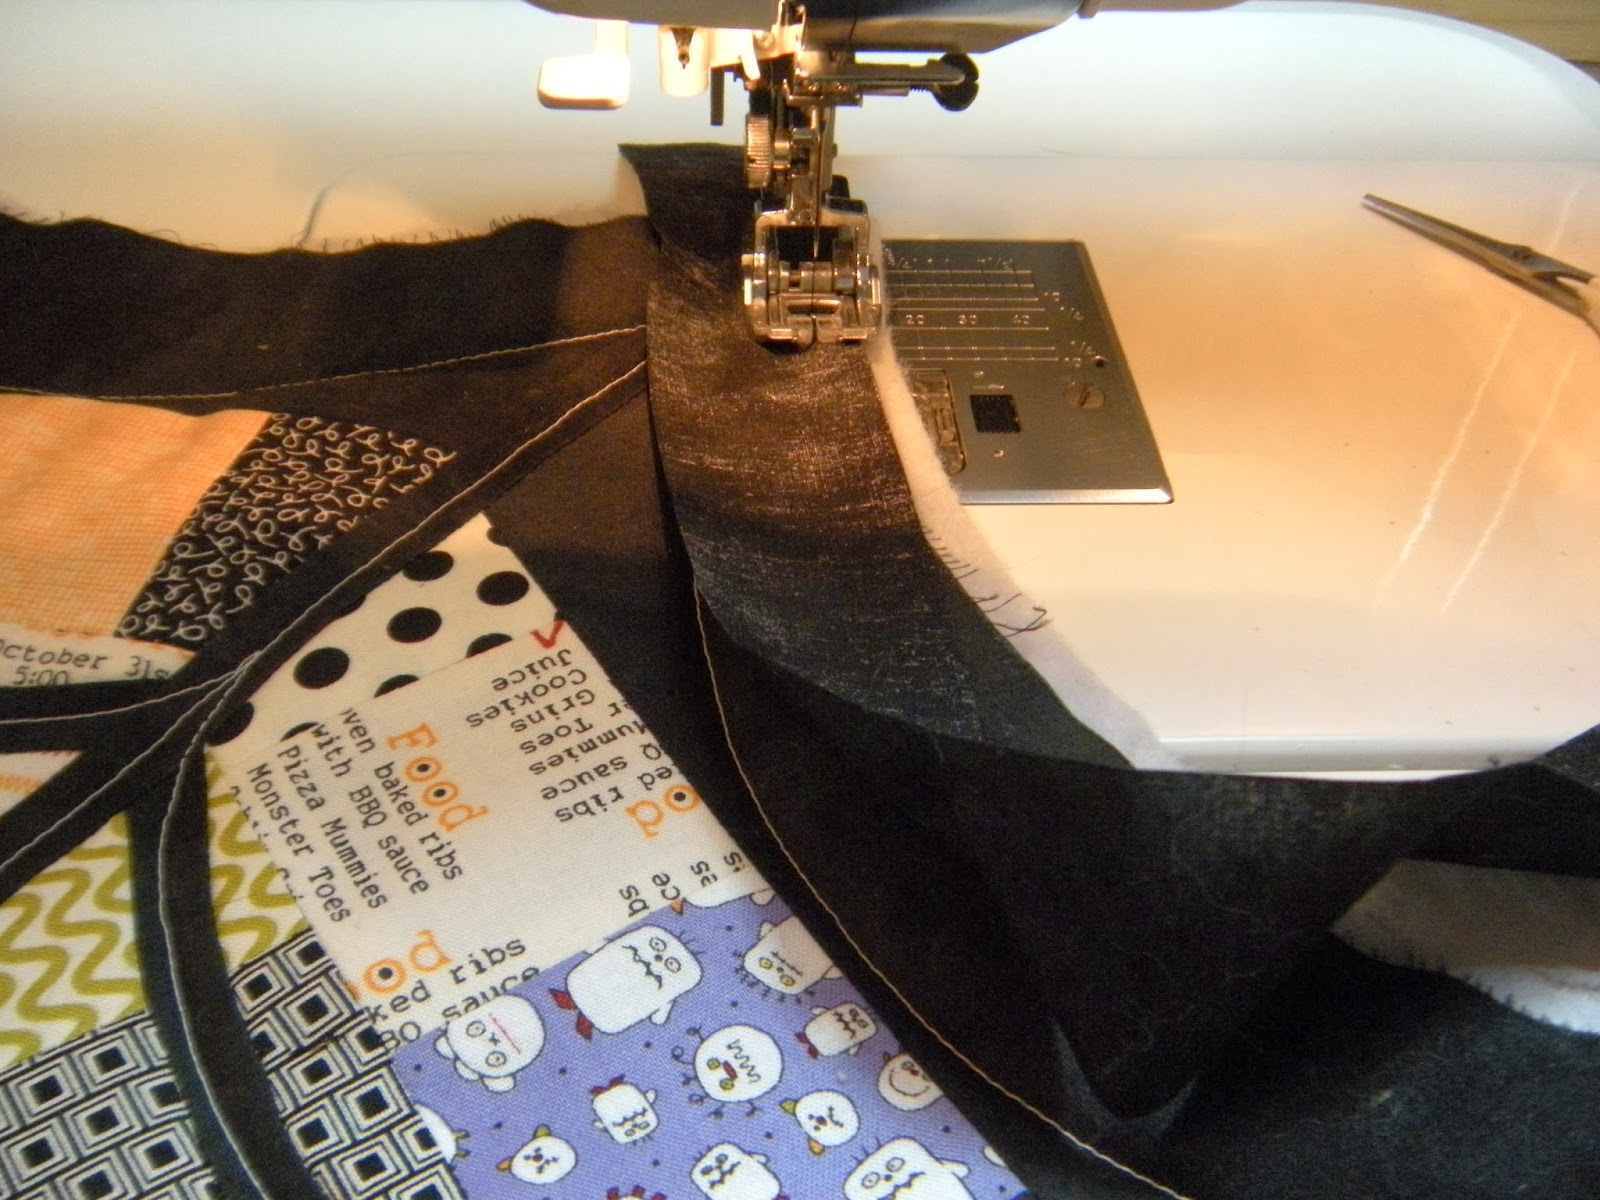
I will be using it again this year to cut the curved pieced spider web quilt ...


... and the outside curves of the web.

Click Here for the Tutorial for my 2013 Spider Web

I am also using it for the "twist" I am spinning on this year's web.

I love this ruler.

If you have another curved ruler or preferred method of cutting curves 
you may want to use your own method for making the spider web.

I might try using a plate if I did not have the quick curve ruler.

If you are sewing the Spider Web Quilt-Along this year 
and choose to use another method, please share your method.  
I love to learn new things.

If you do not have a preferred method of cutting the curves and want to sew a


Spider Web Quilt

you may want to consider adding the


to your quilting tools.

I am not affiliated with this business.
These are just my personal opinions.

If you decide to purchase the QCR and give this method a try,

I suggest that you 

watch all of the helpful


and maybe try one of Jenny's free patterns, 

such as ... 

or 

... sew a few blocks and get used to using the ruler before 

cutting your spider web top.

I love sewing curves and hope you will, too!

Life in the Scrapatch

Tuesday, October 22, 2013

Boo!

 
A Wicked Web
 
I have been waiting all year and wickedly plotting
for the chance to join in this haunting happening!
 
 
Today I get to spin my web in the wonderfully Wicked Blog Hop!
 
Boo Crew!
 
This wicked web started last spring with these adorable mini charms
 
Boo Crew Mini Charms by Sweetwater
that  I was lucky to win in the
 
 April Showers Giveaway @ Busy Bee Quilts
 
 These cute mini charms arrived from
Read giveaway post details Here
 
charm layout
 
Fabric Requirements:
 
2 Boo mini-charm packs ... (I used almost all the charms)
1/2 yard mottled black fabric for web sashing and outer border and binding ... (I had less than an inch left)
 
 
Butterfly helped.
 
  
In addition to my regular cutting ruler,
I used my Quick Curve Ruler
and my
 
 
Kaleido Ruler
 
 
I sewed and pressed
 
 
Katniss helped.
 
 
I cut and sewed some more.
 
 
My quilty kitties were sew helpful!
 
pressed half back
 
Finishing details ...
 

I added a needle-turned applique circle of a Halloween print with a spider
in the center of the web.


I pinned the quilt sandwich only on the edges, back and front, smoothing each side several times and moving pins and repinning as needed.


I used the Glow in the Dark thread donated from favorite local quilt shop,
 Bits 'n' Pieces.
 
I decided simple straight machine quilting lines on the black web was all that was needed.
 
Then I added some hand stitches to the spider in the center and it glows furry in the dark.
 
Although both my hubby and I tried with two different cameras, we did not have one capable of getting a good enough shot of the glow in the dark web to post the photo, but it looks spooky sweet!
 
 
First I quilted the spokes outward.
 
 
Then I added web lines in the curved black sashing.

 
Then I outlined the web once in the back border.
 
 
Cutting the outer curve of the web with my Quick Curve Ruler.
 
 
I used 1.5" strips for the binding cut WOF on the grain. 
 
 I do not cut bindings on the bias ...

and I have never had any issues easing them even around curves.
I hand stitched the single fold binding to the back.
 back
 
 front
 
Time to Trick or Treat!
Giveaway
 
To win these frightfully festive fat quarters please leave one comment
telling me if you prefer to be tricked or treated.
 
Your do not need to be a follower to win, just be sure that I have an email address where I may contact you.
 
My faithful followers may have a second chance to win by leaving me a second comment telling me how you follow.
 
I will send this giveaway anywhere in the world.
 
The winner will be drawn at the stroke of midnight on October 31st!
 
Happy Halloween!
 
I hope you have enjoyed your visit to my scrapatch today!
 
Please visit all these wicked awesome quilters today ...
 
October 22nd
 
 
 Thanks to Madame Samm
and
Wicked Awesome Wendy
 
for this spooktacular blog hop!
 
Thanks to all who have visited and left so many kind comments!
 
So many of you have said that you would like to make on of these for this Halloween, that I am putting up a more detailed tutorial in a
 
 
Spider Web Quilt-Along
 
Part 1 Here
 
Part 2 Here
 
No tricks here ...
(except the sewing tips and tricks kind ... ;)
.. just treats
... and quilty goodness!
 
Enjoy!
 
 
Have a safe and happy Halloween!
 
<3
 

Saturday, June 1, 2013

June Goals

 
Helix Table Runner and Table Mat


My June Goal is to quilt, bind and deliver these table quilts
to my son as a birthday gift for the

My Button
A Lovely Year of Finishes
Linky Party
 
This table runner has been ready for quilting since last November.  I last blogged about it Here.  It is based on the free pattern that came with my new Quick Curve Ruler and started it right after I received it at the end of October.  It was what I was working on Here, when the lights went out with the arrival of Superstorm Sandy. 

I spent the next week or so working on a Fall Table Topper hand sewing and quilting project.  Then I moved into My New Sewing Room and hung it up and then proceeded to get distracted by Christmas Projects and Winter Mystery Quilt Weekend and then in January I joined in my first blog hop at Sew We Quilt  with "In My Words" and have participated in all of these twice a month blog hops ever since.  I am taking a  break from the next one but will be back at the end of the month for ... 
 

Sign Ups Still Open!
 
 
The other goal for me is to continue working on the Wedding Table Quilts for my daughter's reception. I need to take a short break from the purple and The Girl to quilt and celebrate with The Boy.
 
Sew  For June ...
 
(1) Quilt and bind and gift the The Boy's Birthday gifts
(2) Make seven more Love Blooms Flower Quilts for The Girl and Her Groom
(3) Put a "Stamp on It"
 
I have no other sewing and quilting goals for this month.
 
This will keep me very busy.
 
Just keep sewing!
 
:-)


Tuesday, May 28, 2013

Love Blooms Table Quilt

Love Blooms


My first table quilt for my
daughter's wedding is
Quilted and Ready
and looking very bridal!


The Bride's Choice Fabrics

For my  "Say it with Flowers" Blog Hop project
Full Schedule Here
I am making flower table quilts
for my daughter's wedding reception tables. 
I need 8 done by the beginning of August.

I started with a white center,
cut from a 2.5" strip with my

I cut 2.5 inch strips for the next 4 colors.

I sewed the rounds only to the thee outside edges
of the white petal shape.

I pressed, shaped and trimmed after each round.
I used my Hex n More ruler to shape and square.

sewing the last 4th color

my first competed petal

This one is made with all 2.5 inch strips.

It has the distinctive "jewel" shape of the Hex n More.
I like it but I am not sure this is the effect I want.
Hmmmm.
I am thinking I want a wider dark purple band around the edge of the flower which will also be bound in the dark royal purple.
Back to the cutting board ...
to give the petal a wider, rounded edge...
 For the last round this time,  I only added
two triangles on the side with scraps from my strips.
Then I cut a 5" strip for the last piece.
 Adding the last strip is now 5"

this is the idea ... combining the
Hex n More shape
with my
Quick Curve Ruler
to make a rounded edge for the flower

curved or no?

(This looks  a lot like a half of a butterfly to me. Eureka!
This means there is a Butterfly Hex N More quilt in the queue.
But that is for another day ... or blog hop ;)
I think I like the second one, but decided to defer to The Bride.
The Bride says, "I like the curved petals."
:)

Time to make 6 petals for the 1st flower!

When making the petals to assemble the flowers,
press three inward and three outward
so the seams can be nested when sewing them together ...
Butterfly is on watch for suspicious birds while I press.
just keep sewing

Butterfly says, " You keep pressing. I got rid of those birds.  
Now I'll just rest up for the next invasion."

trimming
Butterfly says, "You got this. Cat nap time."
Six Petals!
Time to sew them together!
Katniss is now on quilty helper duty.
detail of back showing seams pressed for nesting
nest and pin seams
 sew, removing pins as you go
 first two petals
sew 3 petals together to form two halves,
press center petal outward to find center point

pin center seam
 nest seams outward, sew two halves together
ready to sandwich and quilt!

 quilting around the flower shape

pin marking and adding the decorative stitch

Katniss inspects my work


keeping the lines straight

Butterfly checks my tension


cutting the flower petal shaped edge


binding the curve


handstitching the binding to the back


close-up of quilting


back

front
One done and seven more of this design to go!
For an Alternate Flower Quilt ...
My daughter asked for two smaller quilts
 for her guestbook table and cake table.
 For more pictures and how to
Click Here

More table quilts to make!
Time to sew!


Thanks for visiting my Flower Scrapatch today!

~<3 ~