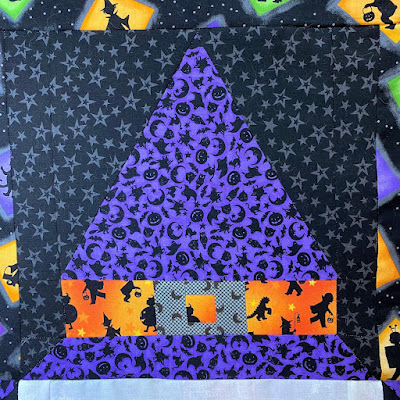
Witch Hat Block ~ Tutorial
Here is my promised tutorial for the Witch Hat Block,
which I designed for my ...
I wanted to make a block with a large purple triangle to add movement to my quilt and extend the purple from the bat blocks and the orange from the pumpkin blocks into the outer block border.
I researched free witch hat blocks online and did not find one that worked,
so I designed my own block.
I am very happy with how this worked up.
I cut the triangles using this ruler, which may also be used to just cut the fabric.
60 Degree 8.5" Triangle Ruler @ Quilt in a Day
Any 60 degree ruler will work or you could use the lines on your cutting mat.
I like making templates and storing them with my block pattern for future block making.
Then I sewed my first black, adjusting the plan as I sewed.
After sewing, my prototype block measured 12.5" wide but only 12.25" high.
I did sew the other blocks to match my first block and they fit perfectly with my other blocks, but I have changed the cutting measurement in this tutorial so those who sew it may be able to make perfect size blocks.
Here are my corrected cutting instructions ...
Cutting for one Witch Hat Block:
Background (Black Stars)
A - Two 2" x 8.5" rectangles
B - Two 2.5" x 2" rectangles
C - Two 8.5" Half Setting Triangles (in opposite side pairs)
D - Two 2" squares
Hat (Purple Print)
E - One 8.5" 60 Equilateral Triangle
F - One 12.5" x 2.5" rectangle
Hat Band (orange print)
G - Two 3.5" x 2.5" rectangles
H - One 1.5" square
Buckle (gray print)
I - Two 1.5" x 1" rectangles
J - Two 1.5" x 2.5" rectangles
Then I pieced the buckles by adding the I rectangles to the top and bottom of the H square, pressed and added the J rectangles to either side.


No comments:
Post a Comment